Administrating and operating windows services can be done in different ways, one of the most useful ways is to do it with PowerShell. With PowerShell we can connect to remote server, to the Cloud and create scripts for automatization. On my Blog and all around the tech Blogs in the Internet you can find a high number of PowerShell scripts, commands and articles. By the way, I can recommend you to have a look on the Blog from Patrick Grünauer. He is a Microsoft MVP who has a fantastic Blog around PowerShell.
However, let us come back to operating with PowerShell. The most of my time I work with the themes in Exchange (messaging), Cloud (Office 365, Azure) and Skype for Business. Here I try to do as much I can by using PowerShell.
The other side of my daily work is also working with virtualisation Platforms like Hyper-V and VMware.
As I have mentioned in this article, Microsoft allows us to do everything by using PowerShell. The same is with Hyper-V. But how about VMware?
The big player on the market for virtualisation are Microsoft with Hyper-V and VMware with vSphere.
vSphere has of course his own command line and his own tool. If you have ever worked with VMware, you have for sure heard about the PowerCLI.
I work with VMware since 2009, today not so much anymore like in the beginning, but still sometimes. That’s why I asked myself the question if there is a way, if I can use PowerShell for administrating VMware environment.
This is actually very easy! There is a PowerCLI snap-in for PowerShell and in this article, I want to show you, how to get and install it.
Online way:
To start, simply start a PowerShell window with administrative permissions on the computer, you want to install the PowerCLI module.
Here we run the following command:
Find-Module -Name VMware.PowerCLI
And we will get the following answer:

As we can see, there is a module in the PSGallery repository. This fact makes it very easy to install the module for PowerShell ins just few minutes.
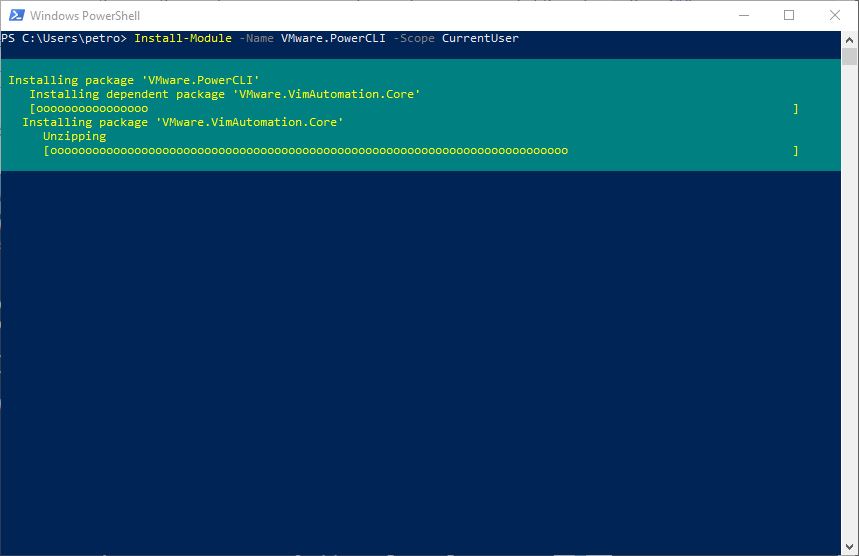
To start the installation, we need the following command:
Install-Module -Name VMware.PowerCLI -Scope CurrentUser

Note: If you would like to make the new module available for all users of the computer, you need to set the -Scope parameter to “AllUser”, and you have to run the PowerShell console as administrator.
After we have started the installation it can take some moment till you see some action in your PowerShell window, don’t worry, that’s normal… 😊
After the installation was successful, we don’t get any notification. However, this is no problem. If we run the command below, we are able to see all installed VMware modules:
Get-Module VMware* -ListAvailable
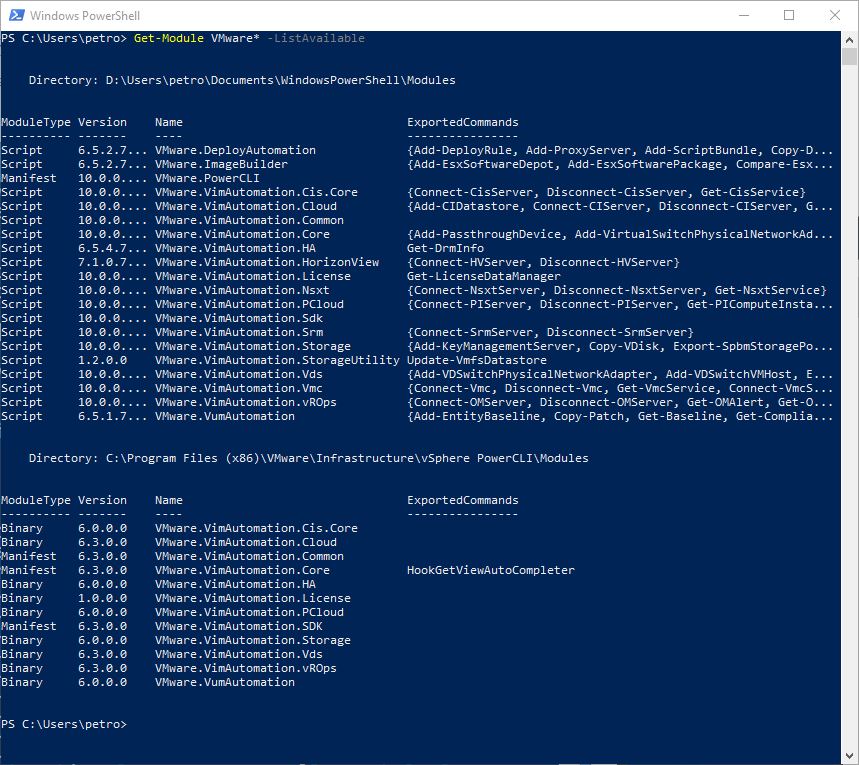
As we can see, everything went fine! 😊
Offline way:
In the best case the setup works like this (online). However, there is also another (offline) way, how we can install the VMware module. We start all in the same way: First we try to find the module with the same command like in the beginning:
Find-Module -Name VMware.PowerCLI
Then we can download the module for offline consumption with the following command:
Save-Module -Name VMware.PowerCLI -Path C:\Path\To\Desired\Folder
Here we see the output:
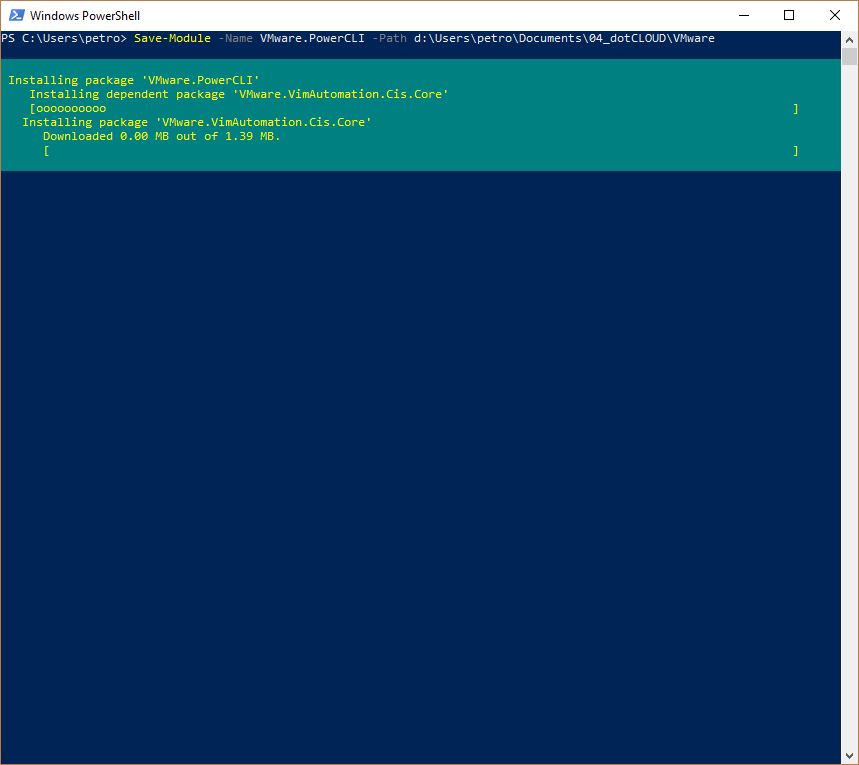
After the progress is done, we can browse to the destination folder, and here we see all downloaded files.

At this point, we’ll want to copy those downloaded folders and place them on the system without internet access in a location where PowerShell can find them, this is the modules folder and can be confirmed by typing $ENV:PSModulePath at the powershell prompt.
Local User: $home\Documents\WindowsPowerShell\Modules
All Users: $pshome\Modules
Using PowerCLI
So last but not least we can start using the VMware module. We only need to import the module after the installation with the following command:
Import-Module VMware.PowerCLI