Thanks to the globalization, companies worldwide are working closer with each other. However, not all companies are using the same messaging solution. In this article, I want to show, how to be able, that Exchange users are able to see the availability (free/busy) of G Suite users.
Preparation on G Suite
The first thing which has to be done is on the G Suite site. The G Suite administrator needs to turn on the Calendars of the users, which need to share schedules from their account. If users from the G Suite also need to receive and process external Calendar items, the administrator need to make sure, that the Gmail service is turned on as well.
Note: if Gmail is not set as primary messaging system, Calendar can only process external calendar invites that are forwarded from the primary messaging system to Gmail.
How to do:
- Sign in to the Google admin console (https://admin.google.com) by using an administrator account.
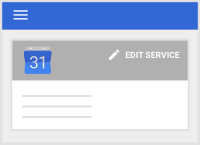
- From the Admin console browse to Apps > G Suite > Calendar.
- At the top right click on EDIT SERVICE.
- To apply settings to individual organizational units, you need to do the following steps:
- On the left, select the organizational unit that contains the users whose settings you want to change.
- To change the setting, select On or Off.
- To keep the setting the same, even if the parent setting changes, click Override.
- If the organization’s status is already Overridden, choose an option:
- Inherit—Reverts to the same setting as its parent.
- Save—Saves your new setting (even if the parent setting changes).
You can use access groups to turn on a service for specific users within an organizational unit. You turn off the service for the organization, and then add the users to an access group that has the service turned on. This lets you give users access to services without making changes to your organizational structure.
After you have turned on the Calendars, the next step is to set the sharing permissions in the G Suite.
Google has a knowledge article about how the sharing permissions has to be configured. This you can find HERE.
Configuring Microsoft Exchange or Exchange online
The next thing which has to be done, is to create a mail contact on the Exchange online or Exchange 2016 environment.
To perform this step we have two ways using EAC or PowerShell.
Create mail contact using EAC
If we want to create a mail contact using the EAC, we can follow the steps below:
- In the EAC, we navigate to Recipients > Contacts.
- Here we click on New + > Mail contact.
- Complete the following boxes on the New mail contact page:
- First name: In this box we type the contact’s first name.
- Initials: In this box we type the contact’s initials.
- Last name: In this box we type the contact’s last name.
- * Display name: In this box we type a display name for the contact. This is the name that’s listed in the contact list in the EAC and in our organization’s address book. By default, this box is populated with the names we enter in the First name, Initials, and Last name boxes. If we didn’t use those boxes, we must still type a name in this box because it’s required.
- * Name: We use this box to type a name for the contact. This is the name that’s listed in the directory service. Like the display name, this box is populated by default with the names we enter in the First name, Initials, and Last name boxes. If we don’t use those boxes, we must still type a name in this box because it’s required.
- * Alias: In this box we type the contact’s alias.
- * External email address: Each mail contact needs to have an external email address that is located outside of our organization. If employees from our organization sends an email to a mail contact, this message will be forwarded to the external email address. That’s why this box is required.
- Organizational unit: We can select an organizational unit (OU) other, than the default, which is the recipient scope. If the recipient scope is set to the forest, the default value is set to the Users container in the domain that contains the computer on which the EAC is running. If the recipient scope is set to a specific domain, the Users container in that domain is selected by default. If the recipient scope is set to a specific OU, that OU is selected by default.
- To select a different OU, we click Browse. The dialog box displays all OUs in the forest that are within the specified scope. Here we select the OU we want, and then click OK.
- When we are finished, we click Save.
Create mail contact using PowerShell
Creating a mail contact by using PowerShell is from the logical side the same if we use the EAC. Below are some examples, how can we do that using the Exchange management shell:
Creating a new mail contact for Desmond Miles in Exchange 2016:
New-MailContact -Name "Desmond Miles" -ExternalEmailAddress [email protected] -OrganizationalUnit Abstergo-Users
We also have the possibility to enable an existing contact for email. In this case we run the following command:
Enable-MailContact -Identity "Desmond Miles" -ExternalEmailAddress [email protected]
Note: This Exchange 2016 commands are also working for Exchange online. However, to be able to perform these tasks you need to connect first to the Exchange online remote PowerShell. A few weeks ago, I posted an article about a function for PowerShell how to easily connect to our Exchange online. I recommend, to have a look on it by following this link HERE.
Next steps
After all mail contacts are created on Exchange, we need to ensure, that all mails sent to the Exchange mail contact’s email address will be delivered to the user’s Gmail address for their G-Suite Account.
Another task that has to be proven is, that all created mail contacts appears in the Exchange Global Address List (GAL), so users can find it when setting up their meetings.
If a G-Suite user also has an Exchange mailbox, we need to make sure that the mailbox is hidden from the Global Address List. That way, the mail contact is selected (and the associated calendar availability is visible) when someone invites the user to a meeting.
Note: If we are using aliases, we need to make sure, that mail contacts contain primary and secondary email addresses. The primary address should use the alias domain (so the availability lookup uses the alias address). The secondary address should use the main Exchange domain (so the contact can be found by users searching the Global Address List).
Creating a Google role account
The Exchange server uses the role account to access G Suite so it can get the availability information of Calendar users. The account should be a standard user account and used only for Calendar interoperability.
This means we need to perform the steps below:
- We create a user account in G Suite. This is the Google role account and is used by Exchange to access Google Calendar users’ availability information. Events must be shared with the Google role account to be visible in Exchange. We need to ensure that this account doesn’t get disabled or deleted!
- We ensure that the Calendar is enabled for the account and that it has either free/busy or event detail access to check availability for all domain users. For event detail lookups to work, the Google role account must have event detail access to Google Calendar.
- We open the Credential generation tool. https://calendar.google.com/Exchange/tools/authui
- Click Generate new credentials.
- When prompted, we sign in as the Google role account, review the Terms of Service, and click Allow.
- Now we click Download to download the generated credentials. Save the credentials, as we need them to add the availability address space to Exchange.
Important: The credentials can be downloaded once, so we need to be sure to save the file and store it in a secure place.
Generating a new set of credentials for the Google role account will revoke any old credentials created for this user. If we want to allow multiple Exchange servers to look up Calendar user availability information (for example, using a hybrid Exchange/Office 365 environment), we generate the credentials once and use them for all your Exchange servers.
Adding an availability address space to Exchange
Google Calendar must be added as an availability address space in Exchange to allow Exchange to query G-Suite for the mail contacts that we had set up earlier.
To do this, for each G Suite domain, we need to run several commands in the Exchange PowerShell. When we run commands, we need to set certain parameters. The configuration tool provides PowerShell code with the parameters required:
- We open the Credential generation tool. https://calendar.google.com/Exchange/tools/configurator
- We upload the credentials file for the Google role account, which we generated in the previous step.
- We set the version of the Exchange server we are configuring and provide the forest name. If we are using a G-Suite alias domain, the forest name should include the alias.
- Now we click Show Exchange setup. We are given a fragment of PowerShell code that can be pasted into the Exchange Management Shell of our Exchange server to configure the availability address space for the server.
Note: Adding an availability address space using the Exchange Management shell we can perform with the command in the examples below:
The first example is useful with an untrusted cross-forest Availability service, or if detailed cross-forest free/busy service isn’t desired. Enter a user name and password when you’re prompted by the command. For an untrusted cross-forest configuration, make sure that the user doesn’t have a mailbox.
Add-AvailabilityAddressSpace -ForestName example.contoso.com -AccessMethod OrgWideFB -Credentials (Get-Credential)
The second example is useful with a trusted cross-forest Availability service. The contoso.com forest trusts the current forest, and the specified account connects to the contoso.com forest. The specified account must be an existing account in the contoso.com forest.
Add-AvailabilityAddressSpace -ForestName example.contoso.com -AccessMethod PerUserFB -Credentials (Get-Credential)
The third example is useful with a trusted cross-forest Availability service. The contoso.com forest trusts the current forest and uses the service account (typically the local system account or the computer account) to connect to the contoso.com forest. Because the service is trusted, there is no issue with authorization when the current forest tries to retrieve free/busy information from contoso.com.
Add-AvailabilityAddressSpace -ForestName example.contoso.com -AccessMethod PerUserFB -UseServiceAccount $true
For more information you can follow the Microsoft Technet article about AvailabilityAddressSpace.
- The last step is to paste the code as a single line into the Exchange Management Shell of our Exchange server. If the availability space already exists, we will be prompted to remove it. It must be removed for the new availability space to be added.
Example: If our Google users’ addresses are in the G-Suite alias domain @alias.abstergo.ch, and we are setting up Calendar Interop for Exchange 2016, or Office 365:
if ((Get-AvailabilityConfig) -ne $null) {
Set-AvailabilityConfig -OrgWideAccount [email protected];
} else {
New-AvailabilityConfig -OrgWideAccount interop@alias. abstergo.ch;
}
$password = echo "vj4XJ711VM6uRfNUZQRzHsBd5rI9qtSwqR9XvDFBDYW_gDawBakTFWLJqqn3SHvZ" | ConvertTo-SecureString -asPlainText -force;
$credentials = New-Object System.Management.Automation.PSCredential -argumentList "alias. abstergo.ch\interop", $password;
Remove-AvailabilityAddressSpace alias.abstergo.ch -ErrorAction SilentlyContinue -Confirm:$false;
Add-AvailabilityAddressSpace -forestName alias.abstergo.ch -accessMethod orgwidefb -credentials $credentials-targetAutodiscoverEPR https://calendar.google.com/autodiscover/autodiscover.xml
After we run the Add-AvailabiltyAddressSpace command, it may take some time for the change to take effect. If we see a delay and want the changes to take effect immediately, we can restart our Exchange server. However, I recommend to wait.
Finalizing
After all the steps in this article are done, we still need verify our availability setup.
To do that we need to sign in into our G-Suite account, create a Google calendar Event and enter an email address of a Microsoft Exchange user to invite them. On this point we should already be able, to see the free/busy information of the Exchange user.
If we can’t see their availability status, we have to check the activity and status of our users in the Calendar audit log.
If there are no errors in our Calendar audit log, we can sign in to a user Exchange account, create a calendar event, and enter the email address of a Google Calendar user to invite them.
Photo by Curtis MacNewton on Unsplash