This short article is about a returning question about how to add or remove smtp alias addresses using the Exchange management shell.
Before we start, we need to check how the mailbox is configured and which the mail address aliases we have already set are.
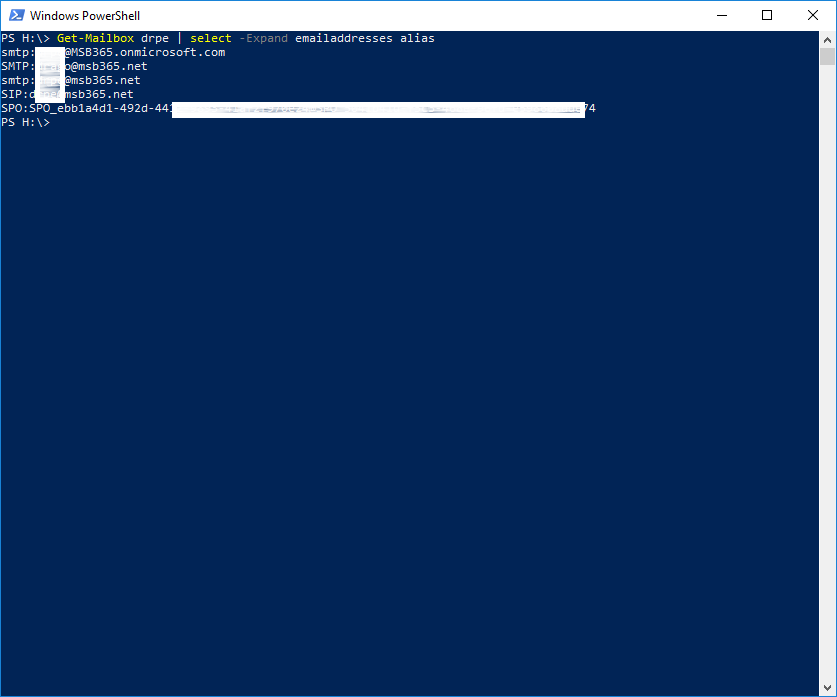
To do that we can run the following PowerShell command:
Get-Mailbox MAILBOX | select –expand emailaddresses alias
By running this command, we get an export, which could look like the following example:
However, if we want now to add an additional alias to our specific mailbox, we can use the following command:
Set-Mailbox MAILBOX –EmailAddresses @{Add=’[email protected]’}
It is very important to do that in this way, if we try to add an email address without the @{ part of the command, all other entries will be removed.
However, to remove a single alias of a Mailbox, the command looks quite similar. We can run the following command:
Set-Mailbox MAILBOX –EmailAddresses @{remove=’[email protected]’}
Searching email addresses with PowerShell
With PowerShell, we can do more than just add or remove single email address aliases.
Another very helpful feature is to search for an email address. In the following example we are searching for an email address which starts ‘da’. To get a usable export, we also use the (*) after ‘da’ which is called wildcard for the result. That means, we will get a list with all mail addresses starting with the letters ‘da’.
The command for that looks like this:
Get-Recipient –Filter {EmailAddress –like ‘smtp:da*’ –or EmailAddress –like ‘da*’}
The command above will return the user of the object that has the searched name or letters in the email address, but it won’t show where. So select the EmailAddress field and expand it to show all values of the multi value object.
Get-Recipient -Filter {EmailAddresses -like 'smtp:da*'} -Properties Name,Emailaddresses | select Name,Emailaddresses -ExpandProperty Emailaddresses
Photo by Biel Morro on Unsplash