Prolog
This article is about an old school topic. In the last few weeks after my vacation, I was supporting a company who had issues between a server and the mail environment to send emails.
In this company, the messaging environment is configured that only authenticated systems are allowed to send messages. This I have configured threw a Kemp Load-balanced.
However, in the particular case one system was not able to send messages, from the messaging site the configuration was right. I recommended the service owner to try to send a mail using Telnet.
It seems that Telnet is an old school method for testing and troubleshooting. The service owner did not know how to send mails using Telnet.
Of course that is not bad, for this reason I will explain in this article how to use Telnet to send messages.
On-premise
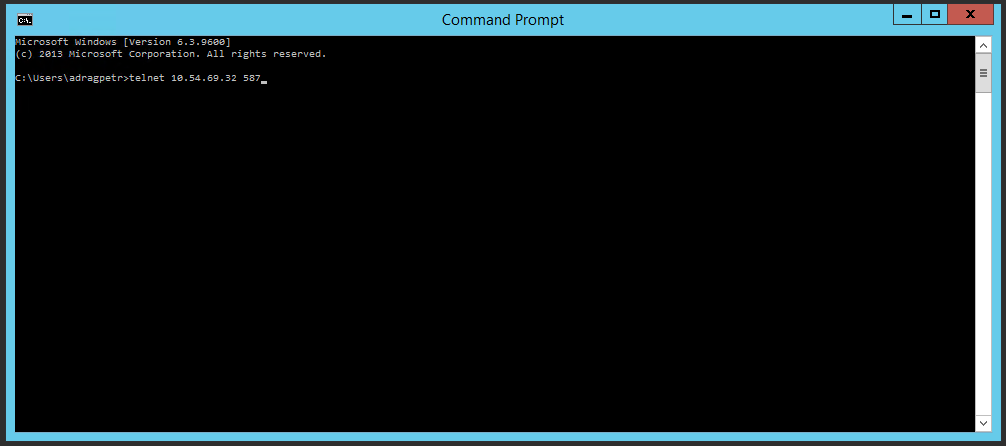
To use Telnet on an on-premise environment we need to start the command prompt on the system we want to test the connection.
In the command prompt we type the command Telnet with the IP of the Exchange server and the Port you want to connect. By default the Port is 25, but in our example we are using the Port 587:
telnet 10.54.69.32 587
If Telnet is allowed on the right Port, we will be connected to the remote server, the answer we get can look like in the picture below:
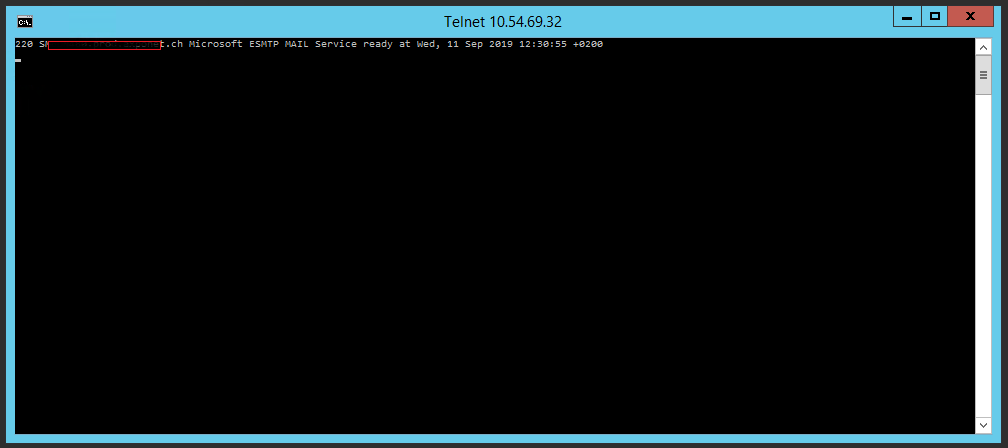
Note: From now we are not allowed to make any typo mistakes. Otherwise we will need to start over again from the beginning.
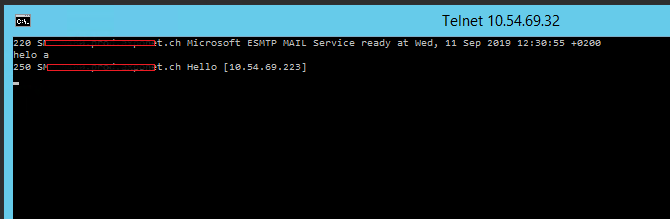
The remote Exchange Server is now ready to receive orders from us. We start with saying hello to the server:
helo a
Now we should receive a 2XX message from the remote Exchange, that shows us that we are allowed to communicate.
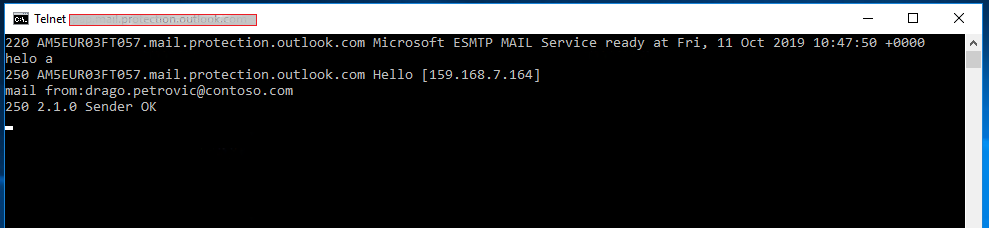
In the next step we need to enter a sender address. This can be performed with the command:
Mail from:[email protected]
Now we need to enter the recipient, the command for that is:
rcpt to:[email protected]
The main things are now set, now we continue with the mail data. For that we run as first the command:
Data

Now we need the Message subject, this can be enterd with the command:
Subject:Testmail for documentation

In the next line we can now start writing the mail text we want to send. After we entered the subject and hit enter, we can start entering a text for the recipient.
To finish the mail, we hit enter again and then a point “.” To tell the remote server that the mail is finished.

In the end we only need to close the telnet session by entering quit and everything is done.

A few moment later I have received the email we just have sent threw telnet.

With this test I was able to prove the service owner, that from the messaging site everything is working fine. So he had to find the issue on an other place.
Exchange Online
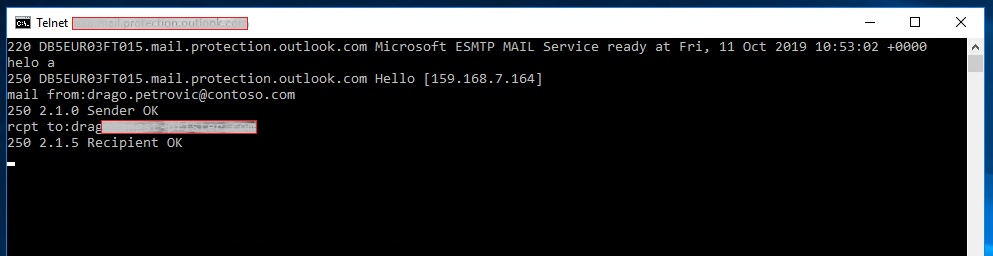
If we are using Exchang online, we are also able to create a telnet session. To do that we can follow the similar steps. First of all, we need to get a connection to our Exchange online tenant using telnet. In this example I will use the Exchange online from the MSB365 Tenant:
We need to open a command prompt and type the Telnet command using the syntax bellow:
Telnet yourtenant-com.mail.protection.outlook.com 25

In the following screenshot, we can see the result, the answer from the EOP server appears on the screen:

From this point we can use the same commands to send emails like we saw in the previous chapter.
Conclusion
First of all note: Telnet is only working if the security is set to allow this type of connection. If you are not able to connect a server by using Telnet the reason can be that the IP is wrong or Telnet is not permitted.