Prolog

One of the biggest dangers in the industry for IT professionals is attacks on their own company network.
There are different types of attacks. As I have described in a previous article, one of the biggest threats are phishing attacks.

There are several providers of employee training aimed at improving awareness of such attacks on the market.


Microsoft itself also offers such tools for its customers. Depending on the licensing, an internal simulated company attack can be carried out in a few simple steps. Microsoft offers different variations of those attacks, which are described in details in this and further articles.


In this article we explain the configuration and execution of such a simulated attack to capture user credentials.


Available attacks

Currently Microsoft offers three kind of attack simulations. Those are:

  • Display name spear fishing attack
  • Password spray attack
  • Brute force password attack


About Password spray and brute force password attacks I will write in a dedicated article.


Prequels

Before we start to create and run a simulated attack in our company, we need to make the following steps sure:

  • As written earlier, the organizations messaging system has to be hosted in Exchange online. Microsoft’s attack simulator is not available for on-premises Exchange environments. If we want to run a simulated attack on on-premises environments, unfortunately we will need third party tools.
  • An IT Engineer, who has to prepare and run the simulated attack needs to be a global administrator un the company’s Office 365 Tenant.
  • The multi factor authentication is turned on for at least the global administrators of the Office 365 Tenant.
  • The organization has Office 365 Advanced Threat Protection Plan 2 enabled. However, in that case the option “Attack simulator” will be available in th Security & Compliance Center.

The Office 365 Advanced Threat Protection Plan 2 is also included in the Office 365 ATP Plan 2.

ATP Plan 2 is also part of the following Office 365 plans:

  • Office 365 E5
  • Office 365 A5
  • Microsoft 365 E5

If your organization don’t run any of those plans, they can be purchased dedicated as an add-on for certain subscriptions.

To learn more, see Feature availability across ATP plans.


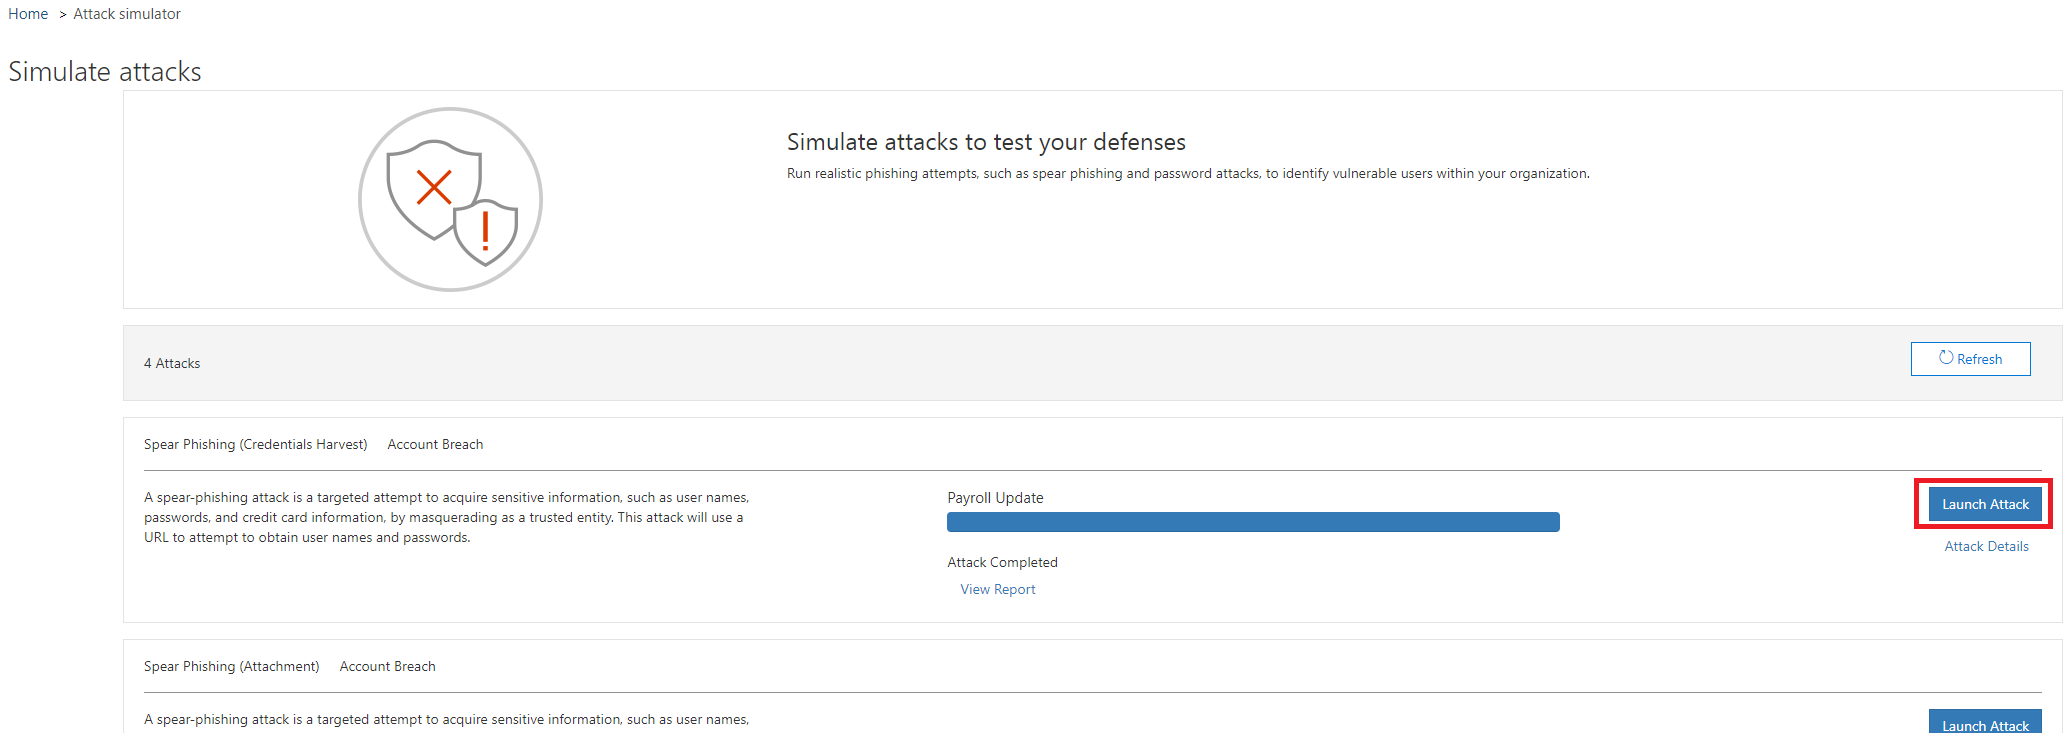
Attack one – Display Name

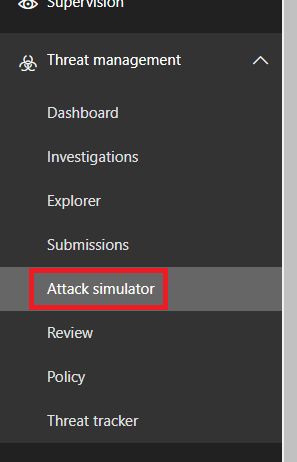
So that we can start planning a simulated attack, we have to go to our Security & Compliance Center first, then we browse further on Threat management > Attack simulator.


In our first case we select the Spear Phishing attack option and click Launch Attack.


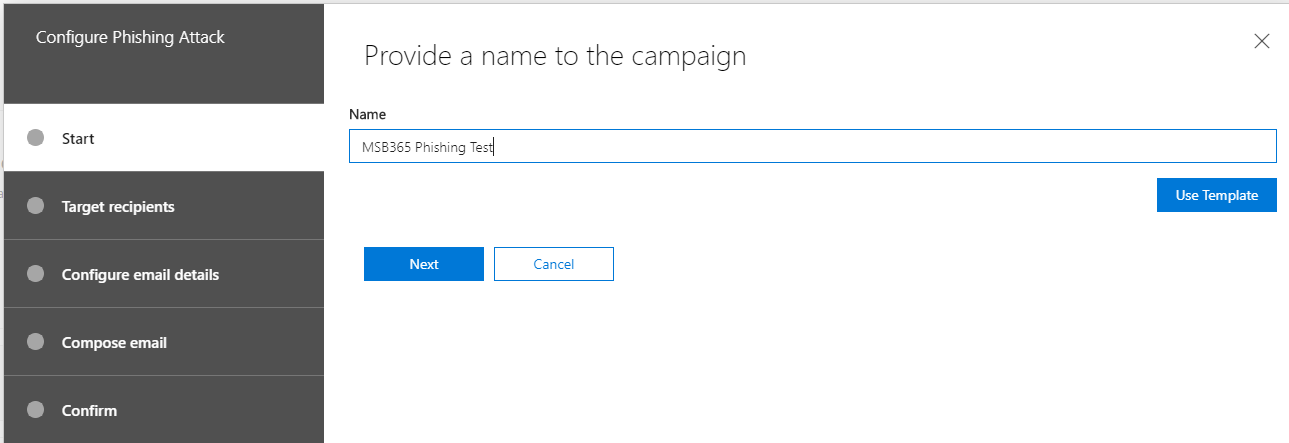
Now the configuration wizard is started. First, we have to give our simulation a campaign name. If this is defined, continue with Next.


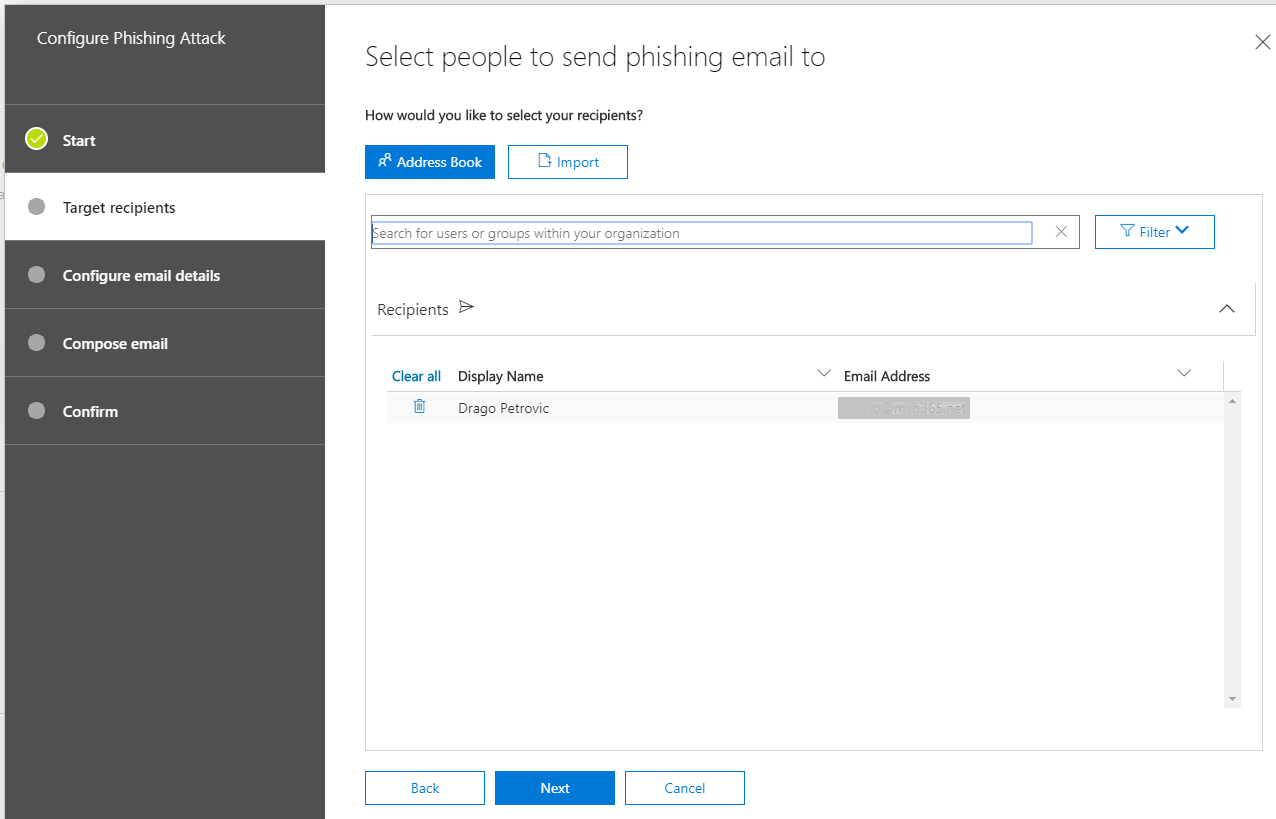
In the next step the target users are defined. A single attack can be executed against the entire organization or only against individual users.


In the next step various settings has to be made. This is also where the theme of the attack is defined. On one hand it is about the design of the message. What should be displayed as the sender of the phishing message? What should be the sender’s e-mail address?

Further you can select in a dropdown window which fake target web address should be presented.

Last two points are real destination web address and the message subject.

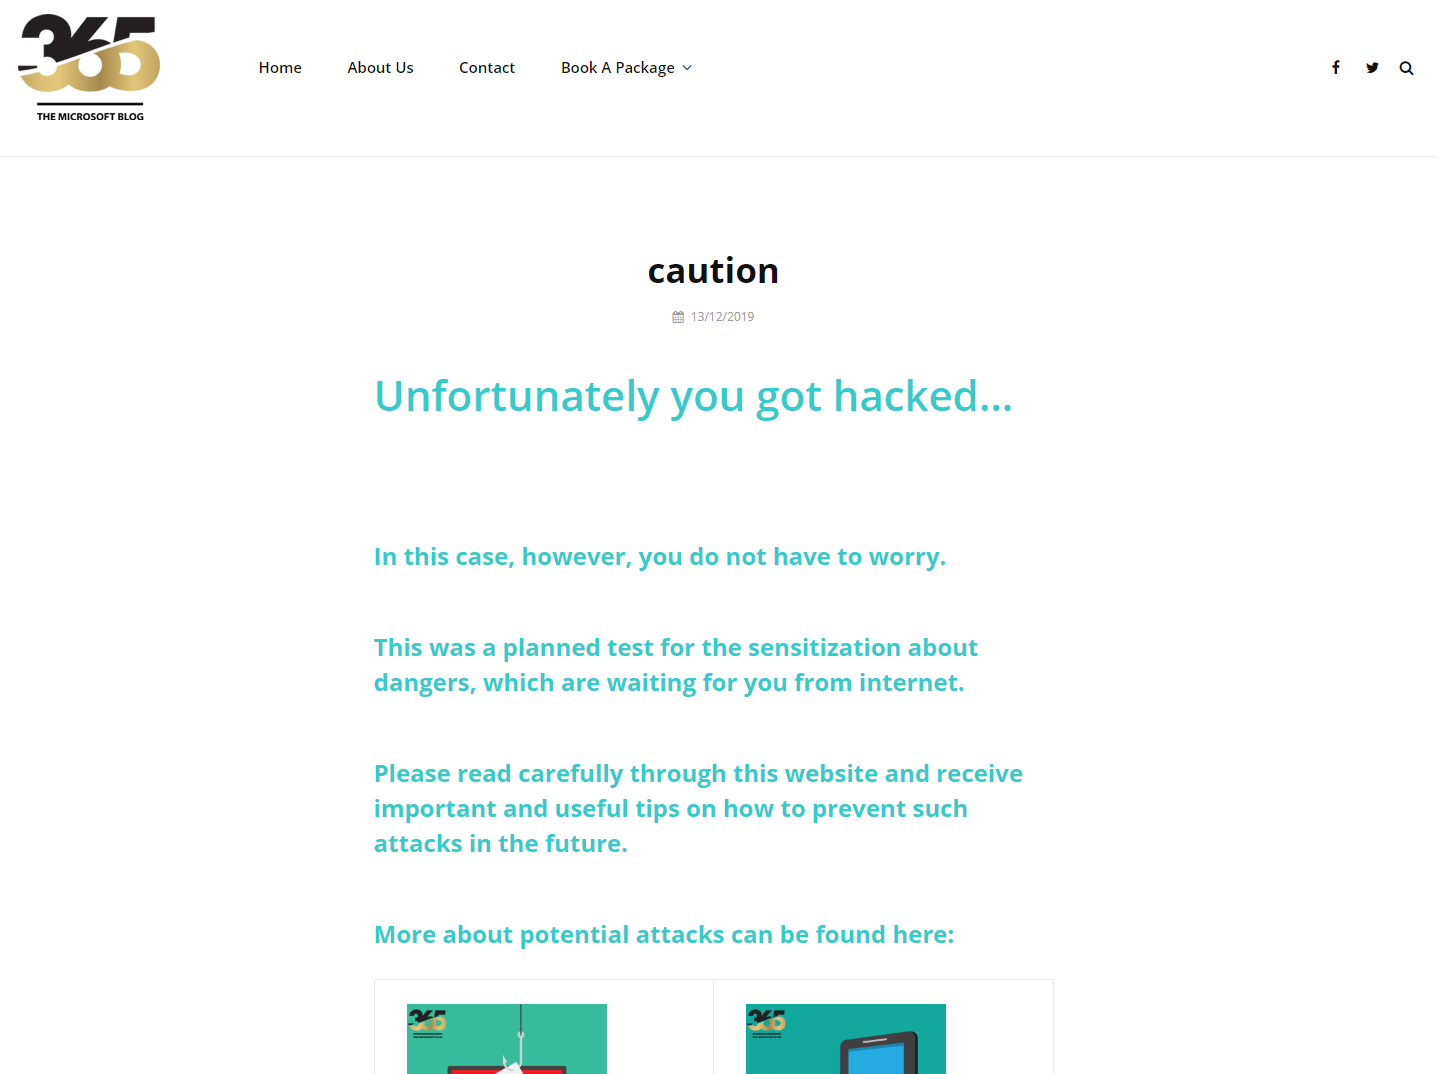
Note: Remember that the Custom Landing Page URL should be a dedicated website, where the users, who have fallen into the trap will be redirected. On this dedicated website the users should get the information that he has been part of a simulated phishing attack.

I am currently preparing such a landing page, as soon as it is ready, you are welcome to refer to it. The custom landing page does not store any information entered by the user. This is a simple redirecting to an info page.


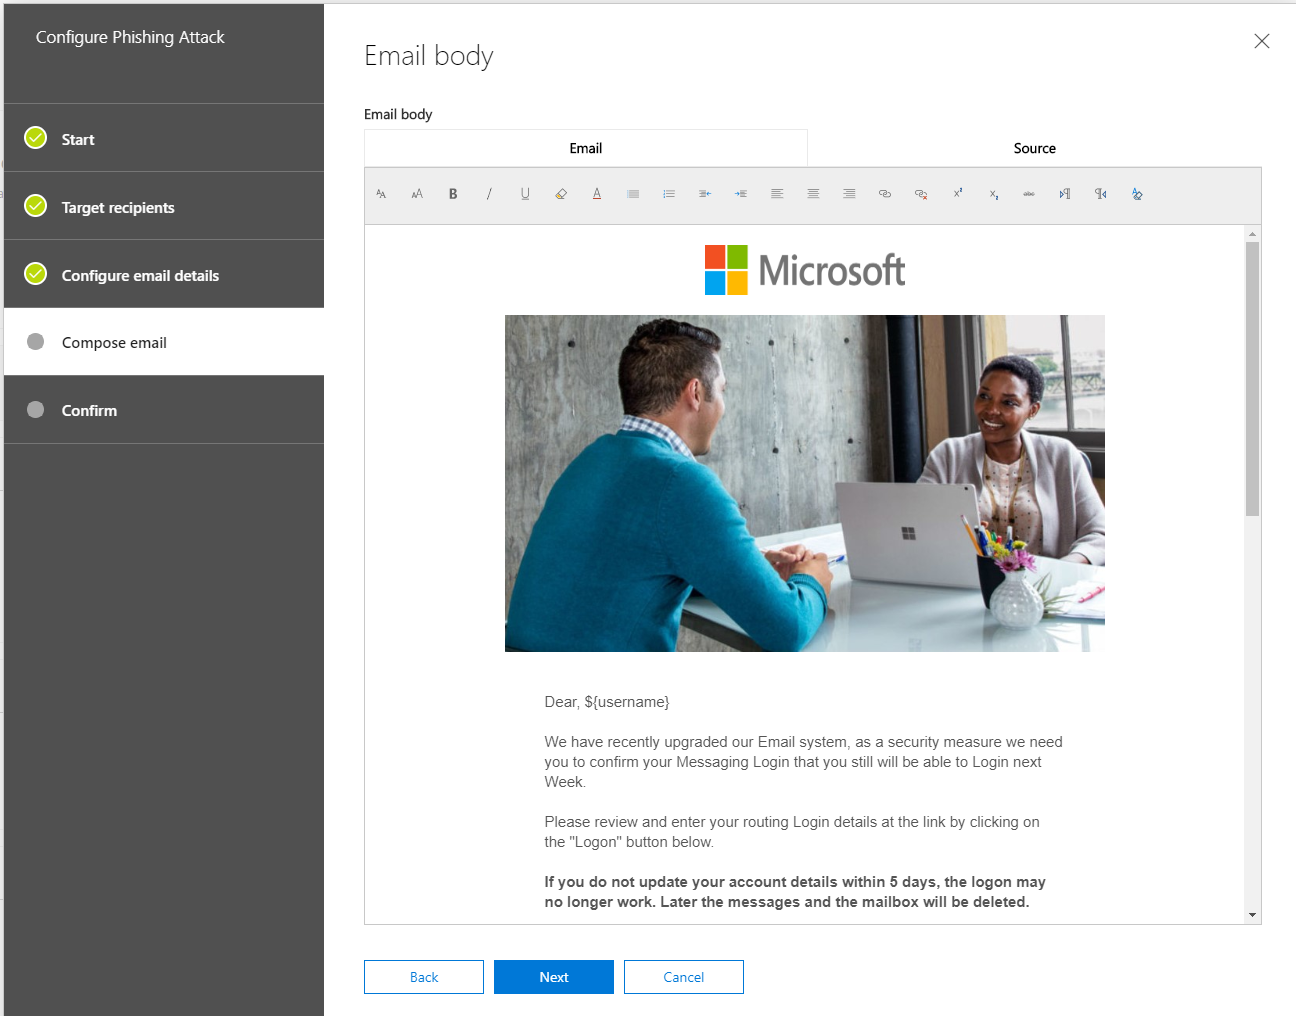
The next step is to generate the message for the users. Microsoft offers a template, which is not very good.

Every administrator, who prepares such a simulation can set up a message either in text form or source form (HTML).

I have prepared a HTML message for you below (I advice you to use the “Download Now” Button if you want to get the File below). My template contains the custom variables and also the link variable for the forwarding.

If you want, feel free to use that one and of course you can modify it so it fits into your scenario.


<meta charset="utf-8">
<!-- utf-8 works for most cases -->
<meta name="viewport" content="width=device-width, initial-scale=1.0">
<!-- Forcing initial-scale shouldn't be necessary -->
<meta http-equiv="X-UA-Compatible" content="IE=edge">
<!-- Use the latest (edge) version of IE rendering engine -->
<title>EmailTemplate-Fluid</title>
<!-- The title tag shows in email notifications, like Android 4.4. -->

<!-- Please use an inliner tool to convert all CSS to inline as inpage or external CSS is removed by email clients -->
<!-- important in CSS is used to prevent the styles of currently inline CSS from overriding the ones mentioned in media queries when corresponding screen sizes are encountered -->

<!-- CSS Reset -->
<style type="text/css">
/* What it does: Remove spaces around the email design added by some email clients. */
/* Beware: It can remove the padding / margin and add a background color to the compose a reply window. */
html, body {
margin: 0 !important;
padding: 0 !important;
height: 100% !important;
width: 100% !important;
}
/* What it does: Stops email clients resizing small text. */
* {
-ms-text-size-adjust: 100%;
-webkit-text-size-adjust: 100%;
}
/* What it does: Forces Outlook.com to display emails full width. */
.ExternalClass {
width: 100%;
}
/* What is does: Centers email on Android 4.4 */
div[style*="margin: 16px 0"] {
margin: 0 !important;
}
/* What it does: Stops Outlook from adding extra spacing to tables. */
table, td {
mso-table-lspace: 0pt !important;
mso-table-rspace: 0pt !important;
}
/* What it does: Fixes webkit padding issue. Fix for Yahoo mail table alignment bug. Applies table-layout to the first 2 tables then removes for anything nested deeper. */
table {
border-spacing: 0 !important;
border-collapse: collapse !important;
table-layout: fixed !important;
margin: 0 auto !important;
}
table table table {
table-layout: auto;
}
/* What it does: Uses a better rendering method when resizing images in IE. */
img {
-ms-interpolation-mode: bicubic;
}
/* What it does: Overrides styles added when Yahoo's auto-senses a link. */
.yshortcuts a {
border-bottom: none !important;
}
/* What it does: Another work-around for iOS meddling in triggered links. */
a[x-apple-data-detectors] {
color: inherit !important;
}
</style>

<!-- Progressive Enhancements -->
<style type="text/css">
/* What it does: Hover styles for buttons */
.button-td, .button-a {
transition: all 100ms ease-in;
}
.button-td:hover, .button-a:hover {
background: #555555 !important;
border-color: #555555 !important;
}
</style>


<table cellpadding="0" cellspacing="0" border="0" height="100%" width="100%" bgcolor="#e0e0e0" style="border-collapse:collapse;">
<tbody><tr>
<td><center style="width: 100%;">

<!-- Visually Hidden Preheader Text : BEGIN -->
<div style="display:none;font-size:1px;line-height:1px;max-height:0px;max-width:0px;opacity:0;overflow:hidden;mso-hide:all;font-family: sans-serif;"> (Optional) This text will appear in the inbox preview, but not the email body. </div>
<!-- Visually Hidden Preheader Text : END -->

<div style="max-width: 600px;"> 
<!--[if (gte mso 9)|(IE)]>
<table cellspacing="0" cellpadding="0" border="0" width="600" align="center">
<tr>
<td>
<![endif]--> 

<!-- Email Header : BEGIN -->
<table cellspacing="0" cellpadding="0" border="0" align="center" width="100%" style="max-width: 600px;">
<tbody><tr>
<td style="padding: 20px 0; text-align: center"><img src="https://secure.msb365.dev/wp-content/uploads/2019/12/microsoft-logo-neu.png" width="200" height="50" alt="alt_text" border="0"></td>
</tr>
</tbody></table>
<!-- Email Header : END --> 

<!-- Email Body : BEGIN -->
<table cellspacing="0" cellpadding="0" border="0" align="center" bgcolor="#ffffff" width="100%" style="max-width: 600px; text-align: left;">

<!-- Hero Image, Flush : BEGIN -->
<tbody><tr>
<td class="full-width-image" align="center"><img src="https://secure.msb365.dev/wp-content/uploads/2019/12/RWo2DB.jpg" width="600" alt="alt_text" border="0" style="width: 100%; max-width: 600px; height: auto;"></td>
</tr>
<!-- Hero Image, Flush : END --> 

<!-- 1 Column Text : BEGIN -->
<tr>
<td><table cellspacing="0" cellpadding="0" border="0" width="100%">
<tbody><tr>
<td style="padding: 40px; font-family: sans-serif; font-size: 15px; mso-height-rule: exactly; line-height: 20px; color: #555555;"> Dear, <span class="&quot;placeholder&quot;" contenteditable="&quot;false&quot;" data-basename="&quot;COMPANY_NAME&quot;" data-hasoffset="&quot;false&quot;" style="&quot;border:" dotted="" 1px="" #d0d0d0;&quot;="">${username}</span> <br><br>We have recently upgraded our Email system, as a security measure we need you to confirm your Messaging Login that you still will be able to Login next Week. <br><br> Please review and enter your routing Login details at the link by clicking on the "Logon" button below. <br><br><strong>If you do not update your account details within 5 days, the logon may no longer work. Later the messages and the mailbox will be deleted.</strong><br><br>Please let us know if you have any questions. <br><br>Thank you. <br>
<br>

<!-- Button : Begin -->

<table cellspacing="0" cellpadding="0" border="0" align="center" style="margin: auto;">
<tbody><tr>
<td style="border-radius: 3px; background: #222222; text-align: center;" class="button-td"><a href="${loginserverurl}" style="background: #222222; border: 15px solid #222222; padding: 0 10px;color: #ffffff; font-family: sans-serif; font-size: 13px; line-height: 1.1; text-align: center; text-decoration: none; display: block; border-radius: 3px; font-weight: bold;" class="button-a"> 
<!--[if mso]>&nbsp;&nbsp;&nbsp;&nbsp;<![endif]-->Logon<!--[if mso]>&nbsp;&nbsp;&nbsp;&nbsp;<![endif]--> 
</a></td>
</tr>
</tbody></table>

<!-- Button : END --> 
<br><div style="text-align: left;"><span style="background-color: transparent;">You will be redirected to the Microsoft Log on page to log in.</span><span style="background-color: transparent;">.</span></div></td>
</tr>
</tbody></table></td>
</tr>
<!-- 1 Column Text : BEGIN --> 

<!-- Two Even Columns : BEGIN -->
<tr>
<td bgcolor="#ffffff" align="center" height="100%" valign="top" width="100%"><!--[if mso]>
<table cellspacing="0" cellpadding="0" border="0" align="center" width="560">
<tr>
<td align="center" valign="top" width="560">
<![endif]-->

<table border="0" cellpadding="0" cellspacing="0" align="center" width="100%" style="max-width:560px;">
<tbody><tr>
<td align="center" valign="top" style="font-size:0; padding: 10px 10px 30px 10px;"><!--[if mso]>
<table border="0" cellspacing="0" cellpadding="0" align="center" width="560">
<tr>
<td align="left" valign="top" width="280">
<![endif]-->

<div style="display:inline-block; max-width:50%; margin: 0 -2px; vertical-align:top; width:100%;" class="stack-column">
<table cellspacing="0" cellpadding="0" border="0" width="100%">
<tbody><tr>
<td style="padding: 0 20px;"><table cellspacing="0" cellpadding="0" border="0" width="100%" style="font-size: 14px;text-align: left;">
<tbody><tr>
<td style="text-align: center;"><img src="https://secure.msb365.dev/wp-content/uploads/2019/12/kisspng-logo-office-365-microsoft-office-2-1-microsoft-co-5b7d99141fd879.1840181715349578441305.png" width="200" alt="" style="border: 0;width: 100%;max-width: 200px;height: auto;" class="center-on-narrow"></td>
</tr>
<tr>
<td style="font-family: sans-serif; font-size: 15px; mso-height-rule: exactly; line-height: 20px; color: #555555; padding-top: 10px;" class="stack-column-center">Office 365 is a cloud-based subscription service that brings together the best tools for the way people work today. By combining best-in-class apps like Excel and Outlook with powerful cloud services like OneDrive and Microsoft Teams, Office 365 lets anyone create and share anywhere on any device.</td>
</tr>
</tbody></table></td>
</tr>
</tbody></table>
</div>

<!--[if mso]>
</td>
<td align="left" valign="top" width="280">
<![endif]-->

<div style="display:inline-block; max-width:50%; margin: 0 -2px; vertical-align:top; width:100%;" class="stack-column">
<table cellspacing="0" cellpadding="0" border="0" width="100%">
<tbody><tr>
<td style="padding: 0 20px;"><table cellspacing="0" cellpadding="0" border="0" width="100%" style="font-size: 14px;text-align: left;">
<tbody><tr>
<td style="text-align: center;"><img src="https://secure.msb365.dev/wp-content/uploads/2019/12/outlook.png" width="200" alt="" style="border: 0;width: 100%;max-width: 200px;height: auto;" class="center-on-narrow"></td>
</tr>
<tr>
<td style="font-family: sans-serif; font-size: 15px; mso-height-rule: exactly; line-height: 20px; color: #555555; padding-top: 10px;" class="stack-column-center">With Outlook, you can quickly connect and share files with the people and groups that matter most. Simplify your life with tools that help you take control of your email and schedule. Find important information fast so you can make decisions even faster.</td>
</tr>
</tbody></table></td>
</tr>
</tbody></table>
</div>

<!--[if mso]>
</td>
</tr>
</table>
<![endif]--></td>
</tr>
</tbody></table>

<!--[if mso]>
</td>
</tr>
</table>
<![endif]--></td>
</tr>
<!-- Two Even Columns : END -->

</tbody></table>
<!-- Email Body : END --> 

<!-- Email Footer : BEGIN -->
<table cellspacing="0" cellpadding="0" border="0" align="center" width="100%" style="max-width: 680px; text-align: left;">
<tbody><tr>
<td style="padding: 40px 10px;width: 100%;font-size: 12px; font-family: sans-serif; mso-height-rule: exactly; line-height:18px; text-align: center; color: #888888;"><webversion style="color:#cccccc; text-decoration:underline; font-weight: bold;">View as a Web Page</webversion>
<br>
<br>
Microsoft&nbsp;Corporation<br>
<span class="mobile-link--footer">Redmond, Seattle</span> <br>
<br><div style="text-align: left;"><b style="background-color: transparent;"><br></b></div><div style="text-align: left;"><b style="background-color: transparent;"><br></b></div><div style="text-align: left;"><b style="background-color: transparent;"><br></b></div><div style="text-align: left;"><b style="background-color: transparent;">Do not share this email</b><span style="background-color: transparent;">&nbsp;</span></div>
<unsubscribe style="color: rgb(136, 136, 136);"><div style="text-align: left;"><span style="background-color: transparent;">This email contains a secure link to a secure site. Please do not share this link email with others.&nbsp;</span></div>
<br><div style="text-align: left;"><span style="background-color: transparent;"><b style="">Questions or concerns about the new Email Service?</b>&nbsp;</span></div><div style="text-align: left;"><span style="background-color: transparent;">If you have any questions about the site, please visit our support page support page rather than replying to this email.</span></div></unsubscribe></td>
</tr>
</tbody></table>
<!-- Email Footer : END --> 

<!--[if (gte mso 9)|(IE)]>
</td>
</tr>
</table>
<![endif]--> 
</div>
</center></td>
</tr>
</tbody></table>

Or as a File:


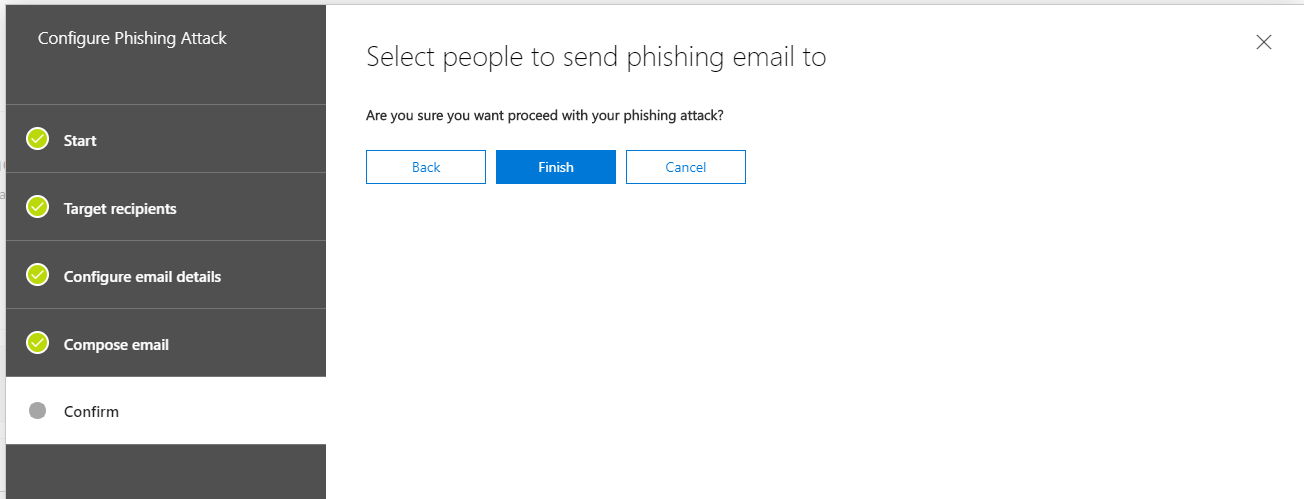
The configuration of the simulated attack is now complete. Click Finish to start it.


The attack has started – User view


Let’s change perspective now. We have started the simulation. Since Microsoft has configured the simulated attack for its own tenant, we don’t have to worry that the message will end up in the SPAM folder. Normally the phishing message will end up in the inbox as usual.

This message can look like the following example:


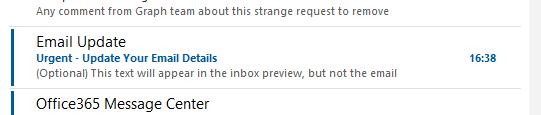
After opening the message, we also see who the sender is (including the defined e-mail address) and subject.

It is also exciting that the predefined variables are immediately dragged in the mail text and the affected user is personally addressed by name:


Further down in the message there is also a button with a link. If the user clicks on this link, he will be redirected to a simulated Microsoft Sign-In Page.

This is the fake link, that we had defined earlier in the wizard during simulation configuration.


If the user has now also entered his credentials and then clicked on Log-In, he has become a victim of the simulated attack. The redirection follows the Custom Landing Page URL which has been defined by the administrator. As already mentioned, I will soon provide such a landing page for free to use.


Reporting


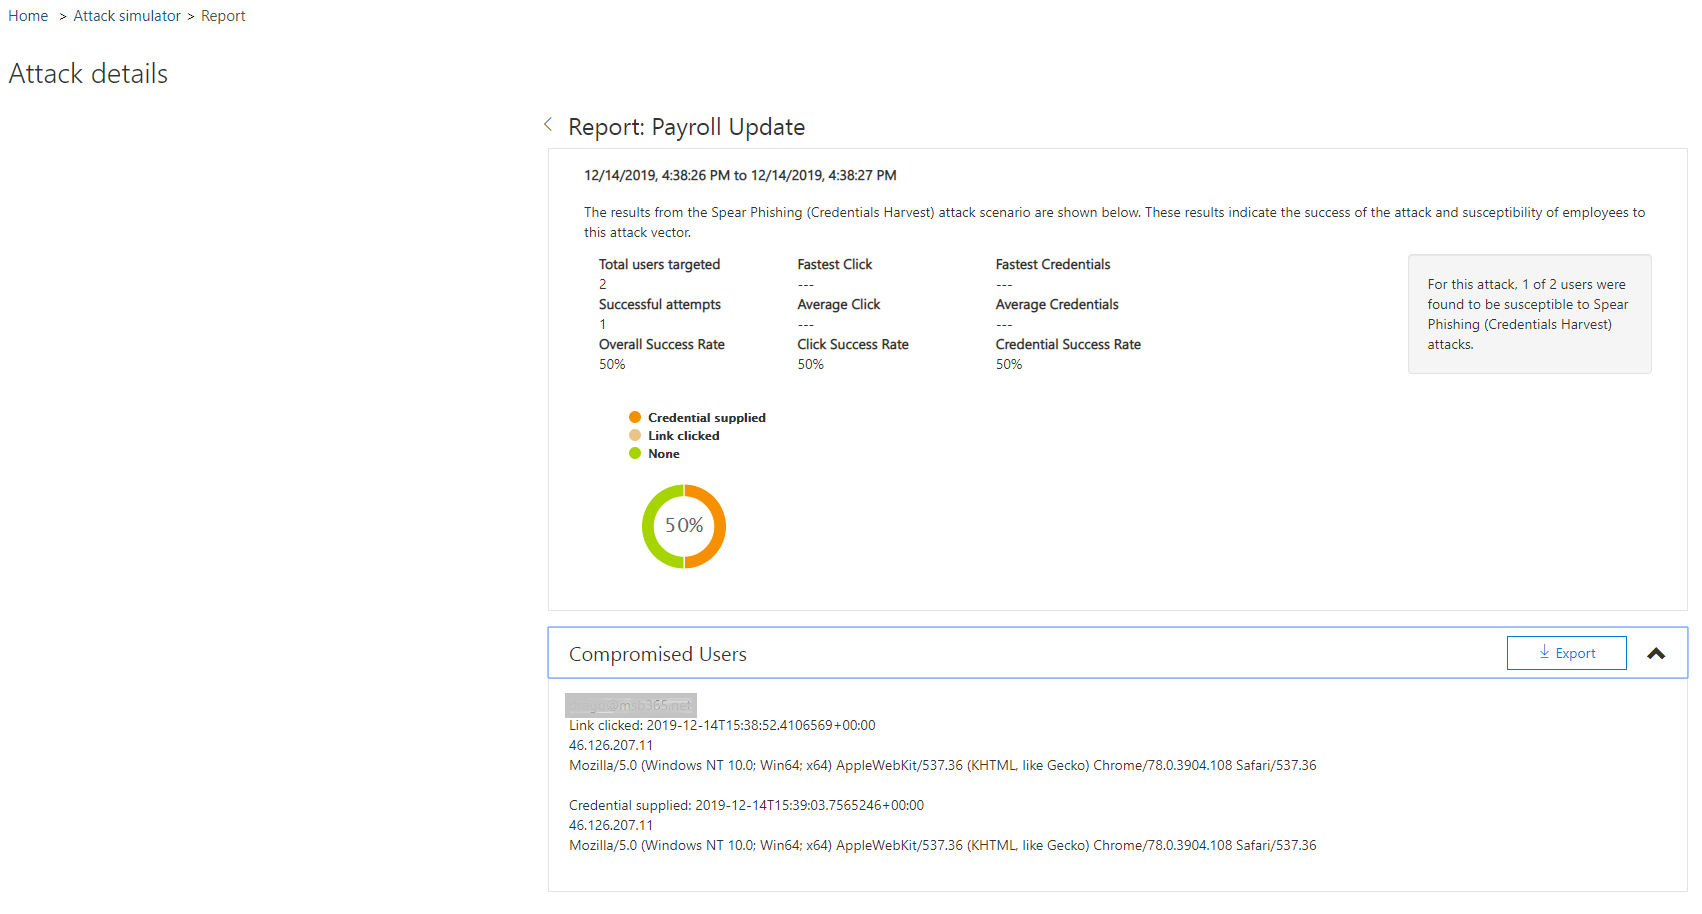
After the simulation is finished, we can go back to the Admin Center as administrator. We can see at a glance how far the simulation has progressed and with a click on View Report we can see further details.


As we can see in the picture below, we get a clear and structured overview here of the test results. Finally, we can also export them.

Passwords of the users are not listed of course, but which users have clicked on the link and which have entered their credentials.


Conclusion | Preview Part two

As we could see, such a simulation is very easy and fast to implement. Only the phishing message itself and the landing page need more time. How hard such a simulation should be for the users, depends on the administrator.

He can send the message consciously “inaccurately” or generate – depending upon enterprises – also very specifically.

From my point of view, it is important to carry out such simulations time by time and to train the users afterwards.

In one of my next articles I will also describe the Password Spray attack and Brute-force password attack.

But I started with this example because I think this is by far the biggest threat.