An extremely important element in the field of telephony, apart from incoming calls and their management, is the element of outgoing calls.
Each user has his or her personal telephone number, which also appears on the display when an outgoing call is made to the other party.
Now, however, there is a requirement – especially with service providers – that a call should not be made from the personal telephone number, but from a collective number.
I am thinking of a support organization as an example. If a supporter has to call a customer back, the outgoing number should not be the personal number, but the number of the support team.
Microsoft Teams offers the function “Caller ID policies” in the Teams Admin Center for this purpose. These can be found in the Admin Center under Voice > Caller ID policies.
Editing the default policy is possible here, as well as creating new custom policies.
I personally do not recommend editing the default policy. This is because it is global. I create new custom policies whenever possible.
Create new Caller ID policies
Personally, I prefer to do this task via PowerShell. I like to refer to this Microsoft Technet article.
In order to simplify this process, I would like to share my personal experience with you.
When creating a new caller ID policy, it is important to know what type of policy it should be. There are four different options:
- Anonymous
- Service
- LineUri
- Resource
It is important to know that currently the option “Resource” cannot be configured via the Web GUI of the Teams Admin Center.
However, since in my case this is the variant I mostly need, I will show my example here.
First, we need the object ID of the resource account for which we want to create our policy. We put the output of the required PowerShell command in a variable:
$ObjId = (Get-CsOnlineApplicationInstance -Identity [email protected]).ObjectId
Note: Of course, the first thing we need to do is connect to our Teams Tenant via PowerShell. The first thing we need is the command:
Connect-MicrosoftTeams
Then we need the company name, which we can either enter manually or take the exact name from the tenant.
If we decide on the second variant, we can do this as follows:
Connect-MsolService
$company = Get-MsolCompanyInformation | select DisplayName
Now we can execute the actual command:
New-CsCallingLineIdentity -Identity 6600 -CallingIDSubstitute Resource -EnableUserOverride $false -ResourceAccount $ObjId -CompanyName $company -Description "6600 Contoso Support"
As you can see, we need more information for this command. The “Identity” is the display name of the policy that will later be assigned to the user.
The “CallingIDSubstitute” describes the type of policy we saw at the beginning of this article.
The “Description” is not a mandatory field, but I recommend including it as well, because it serves as a good basic documentation depending on the naming concept of the policies.
Now the policy is created, and we can continue with the assignment.
Assigning users to the corresponding caller ID policies
There are three different ways in which a user can be assigned to the corresponding policy.
If it is a matter of individual users and/or policies, this can be done via the Admin Portal.
Another possibility is to use PowerShell here as well.
For individual users, this can look like this, for example:
Grant-CsCallingLineIdentity -Identity "[email protected]" -PolicyName 6600
This usually works very well and without problems.
But what if we need to assign 200 (or more) users in 30 (or more) caller ID policies?
To solve this chalange quickly and safely, I have created a PowerShell script.
To use this script, you only need a CSV file which is structured as follows:
"UserPrincipalName","DisplayName",PolicyName“
Note: If you want to remove the existing caller ID policy for several users, you can simply enter $Null in the CSV under PolicyName. This ensures that no caller ID policy is assigned to the corresponding user.
Here is how to use the script:
 |
After running the script for the first time, we have to accept the licence conditions, otherwise we cannot use this script. |
 |
Now the script asks us whether we want to connect to our Teams tenant. If we already have a connection to Microsoft Teams in the existing PowerShell window, we can continue here with “N”, otherwise we select the option “Y”. |
 |
If we have selected the option “Y”, we must now log on to the tenant. |
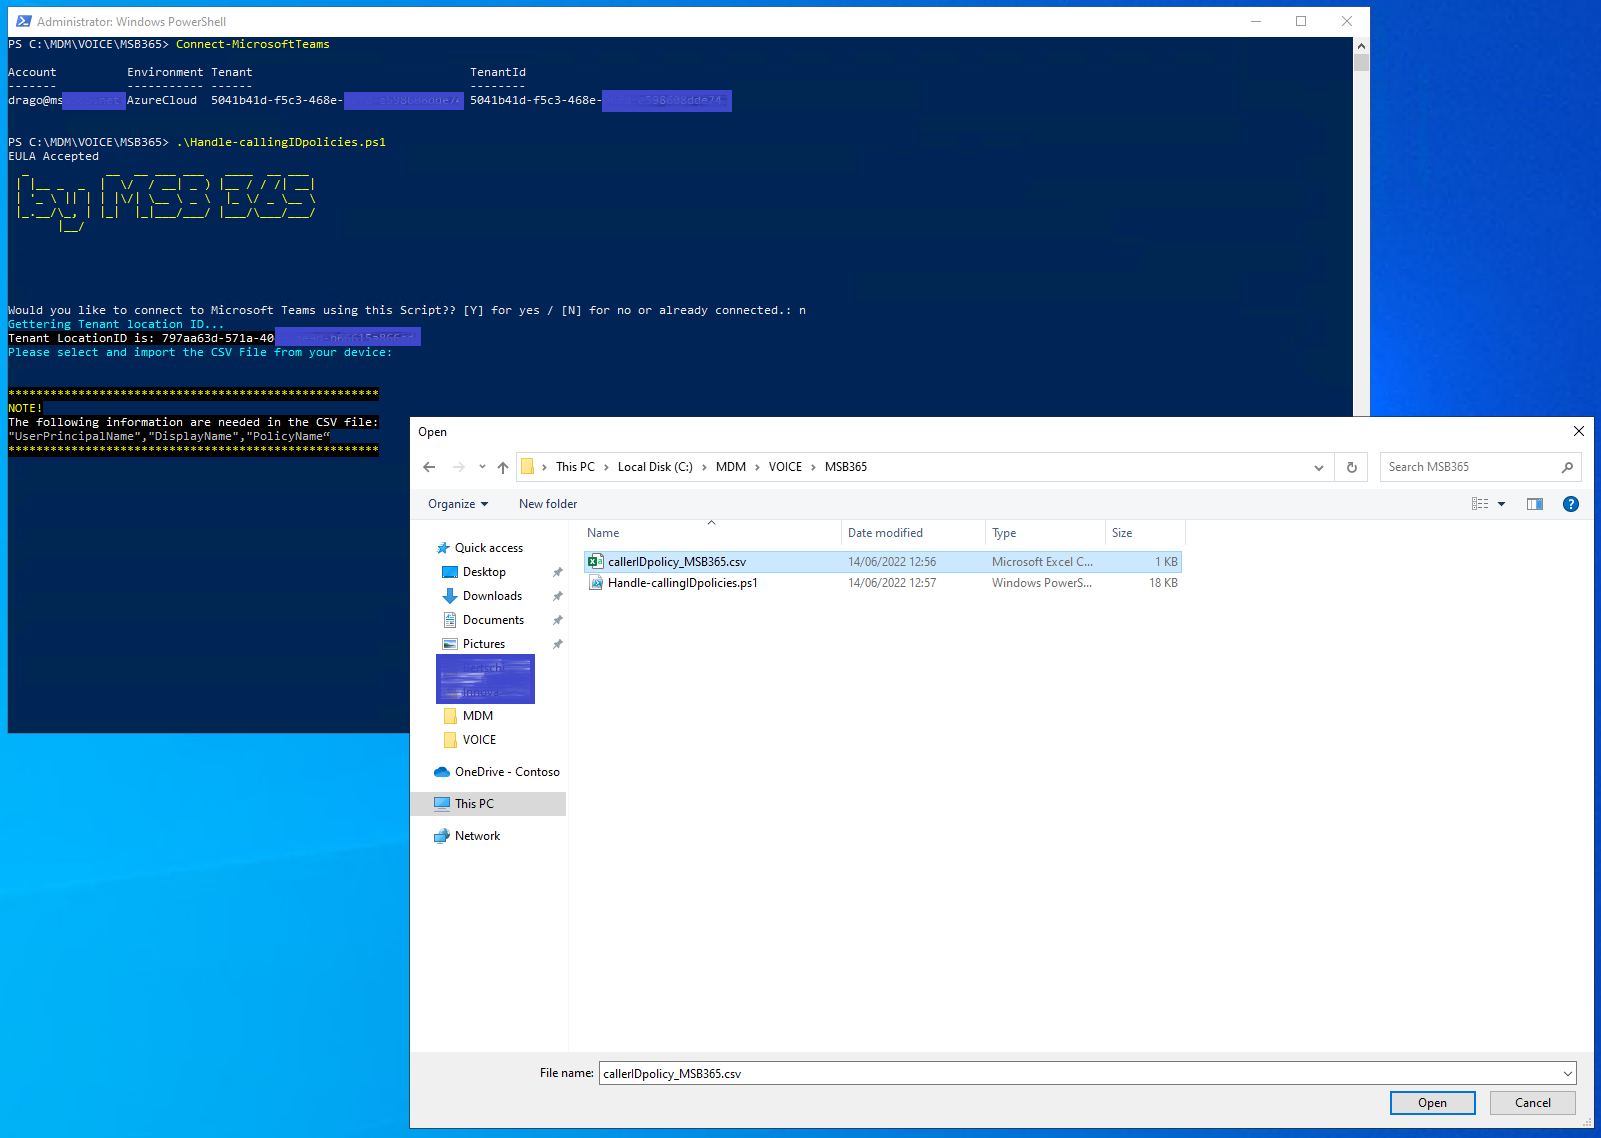 |
After the successful login, the script now starts its work and asks for the corresponding CSV, as described in this article.
The format of the CSV is also displayed again.
A window opens where we can comfortably browse for the corresponding CSV. |
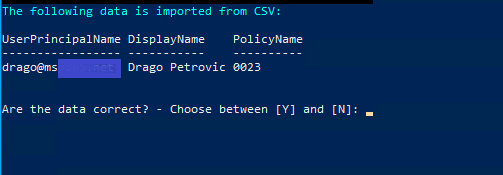 |
After the import is complete, the script shows us the entire import again, so that we can check it again if necessary.
If we have accidentally imported the wrong CSV, we can simply continue with “N” and select a new CSV file. However, if the information is correct, we continue with “Y”. |
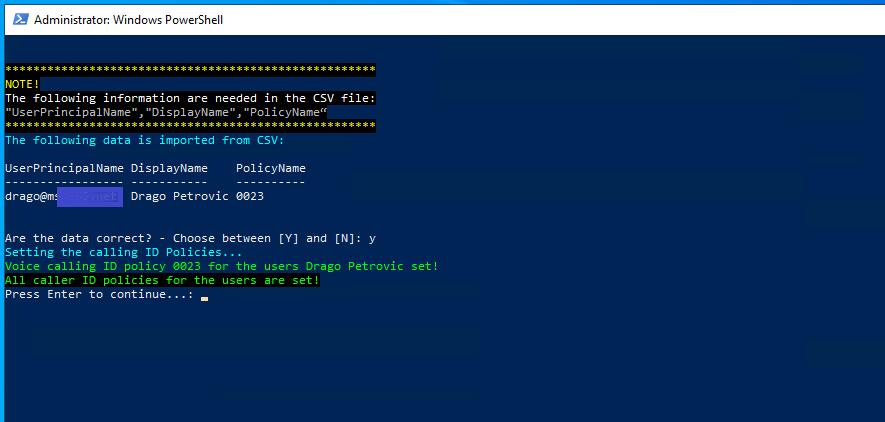 |
Now the policies are created as entered in the CSV and displayed individually in the PowerShell window. |
You can find the script itself on my GitHub page.
As always, this script is available for free to anyone who needs it. You can download it from my GitHub repository and use it.
Also as always, I assume no responsibility for possible misconfigurations and strongly recommend to use the first run of this script in a LAB or test environment.
This script can be used and adapted indefinitely, but not sold to third parties.