From time to time I get requests from customers for the following scenario:
The customer basically has a hybrid infrastructure, must (or wants to) continue to operate Exchange on-premise. However, the customer wants to protect the Outlook Web App (OWA) of the on-premise messaging infrastructure with Multi Factor.
On the one hand, this can be easily implemented with AD FS. In most cases, however, customers do not want to use AD FS (otherwise there is no longer any use). After initial discussions, the desire for conditional access with various policies usually arises.
This whole process then usually ends with us realizing a project where we implement the Entra Application Proxy solution.
In this article, I describe how this can be realized.
Prerequisites
In order to be able to use the Entra Application Proxy for on-premise Exchange, we need the following prerequisites:
- An on-premise domain controller which is in a supported state.
- An Exchange server (on-premise of course).
- A server on which the App proxy agent can be installed and executed.
- Licensing: At least one, or more of the Entra ID P1 or P2 licences
Installation of Entra Application Proxy Agent
Assuming that the on-premise Exchange is already fully installed and configured, and is currently working properly, we will now take care of the app proxy configuration.
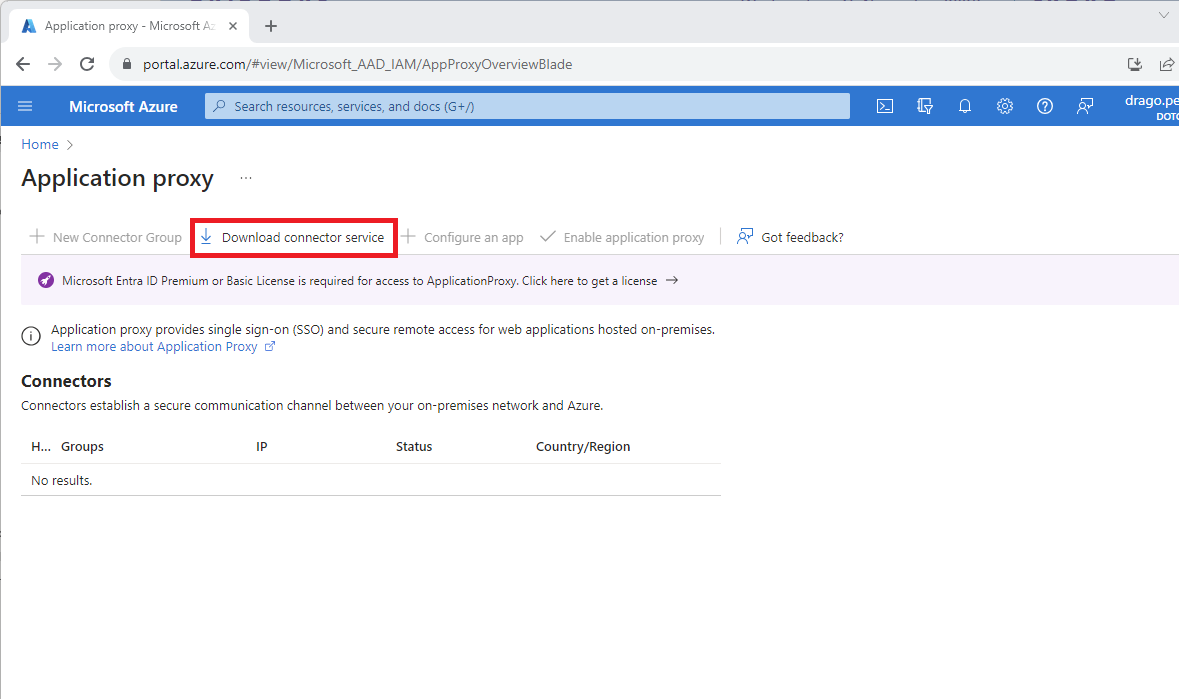
| To do this, we first browse to the Azure portal and search for the app proxy
Here we click on Download connector service from the server where we want to install this agent. |
 |
| Once we have downloaded the agent, we can now install it.
This setup is pretty straight forward.
During the setup, we are asked to log in to our tenant, among other things. |
 |
Next configuration steps Application Proxy
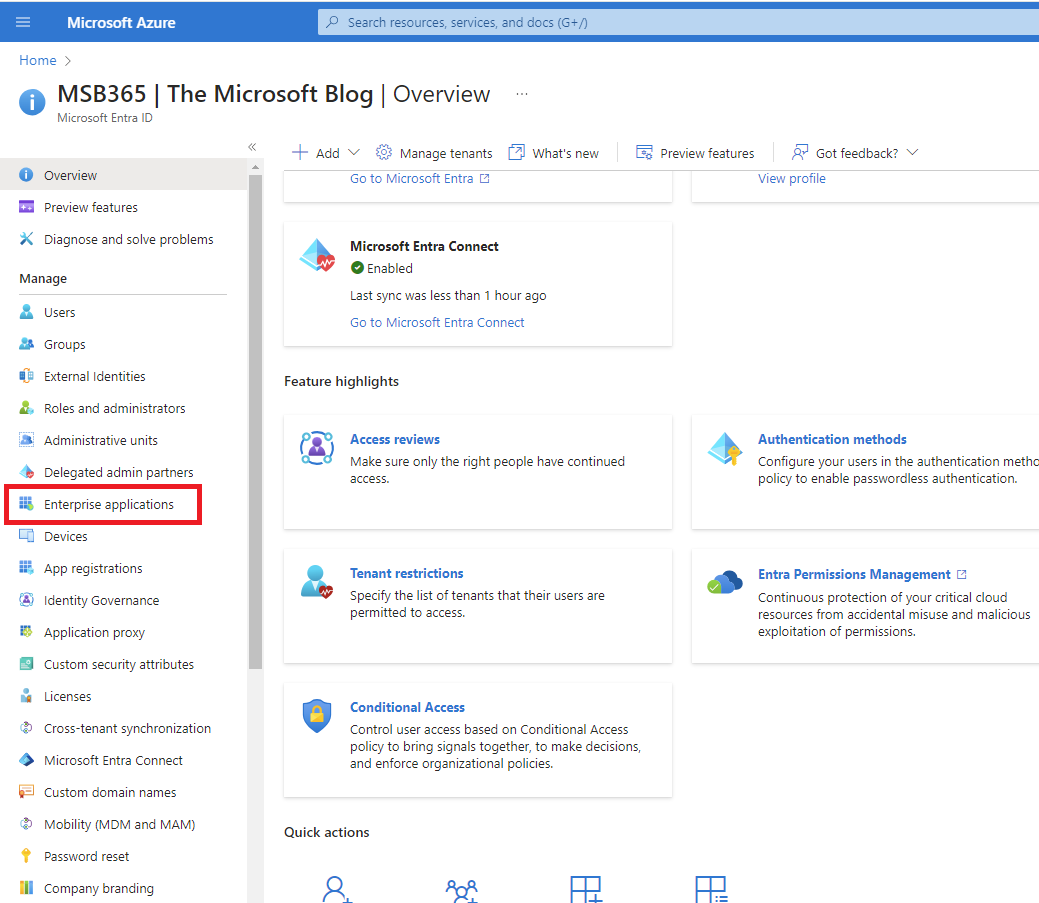
| Once the agent installation on the server is complete, we go back to our Azure portal. We now search for “Enterprise applications”
|
 |
| We can now add a new application at this point | 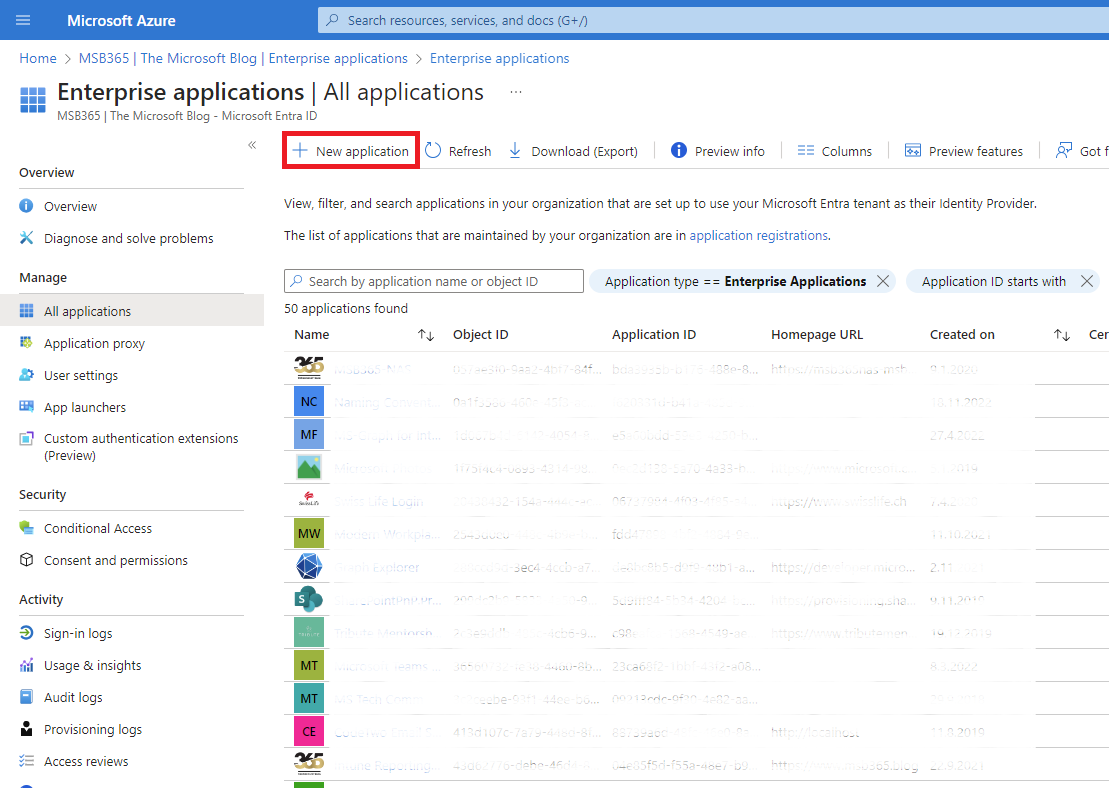 |
| Now we get an overview of what is basically possible. However, as we are dealing with the use case of on-premises OWA in this article, we will select the option marked in the image accordingly. |  |
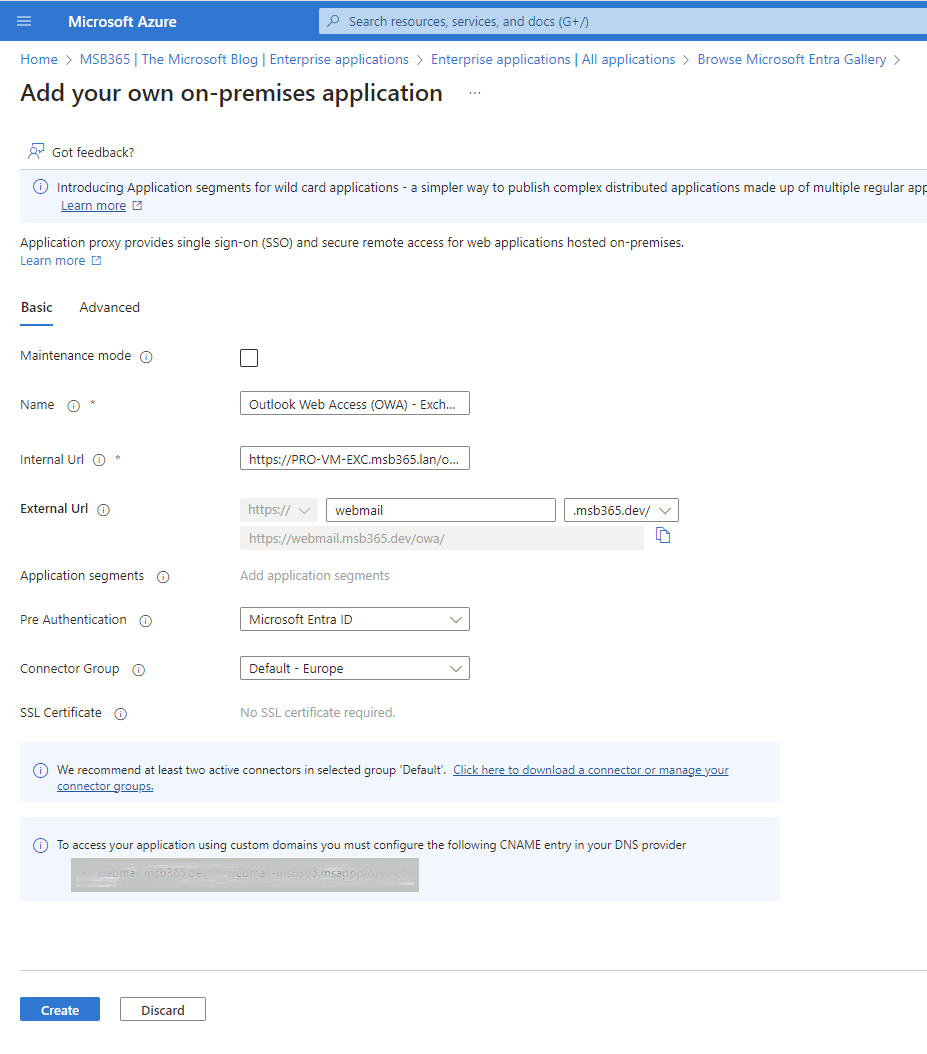
| In this step, we must provide the correct configurations accordingly. These are composed as follows:
Name : The name of your application, this will also be advertised when you publish the application to My Apps. Internal URL : Enter the internal URL for the app, I’ve entered the full Outlook Web App path because this will directly forward the proxy connections to Outlook Web App. External URL : The URL the user is going to enter in order to reach Outlook Web App, you can either use a “default” URL or one of your own domains. In below example I’ve used the default one but you can also use your own URL. In order for that to work you will need a valid certificate for the URL you’re going to use. This could of course be a wildcard URL you own. Pre Authentication : Where going to use Entra ID in order to use all the benefits Translate URLs In | Headers : Set this to No in order to let Outlook Web App process the authentication correctly. Translate URLs In | Headers : Set this to No in order to |
 |
| In this step, we can now configure the customization and properties of the new app. | 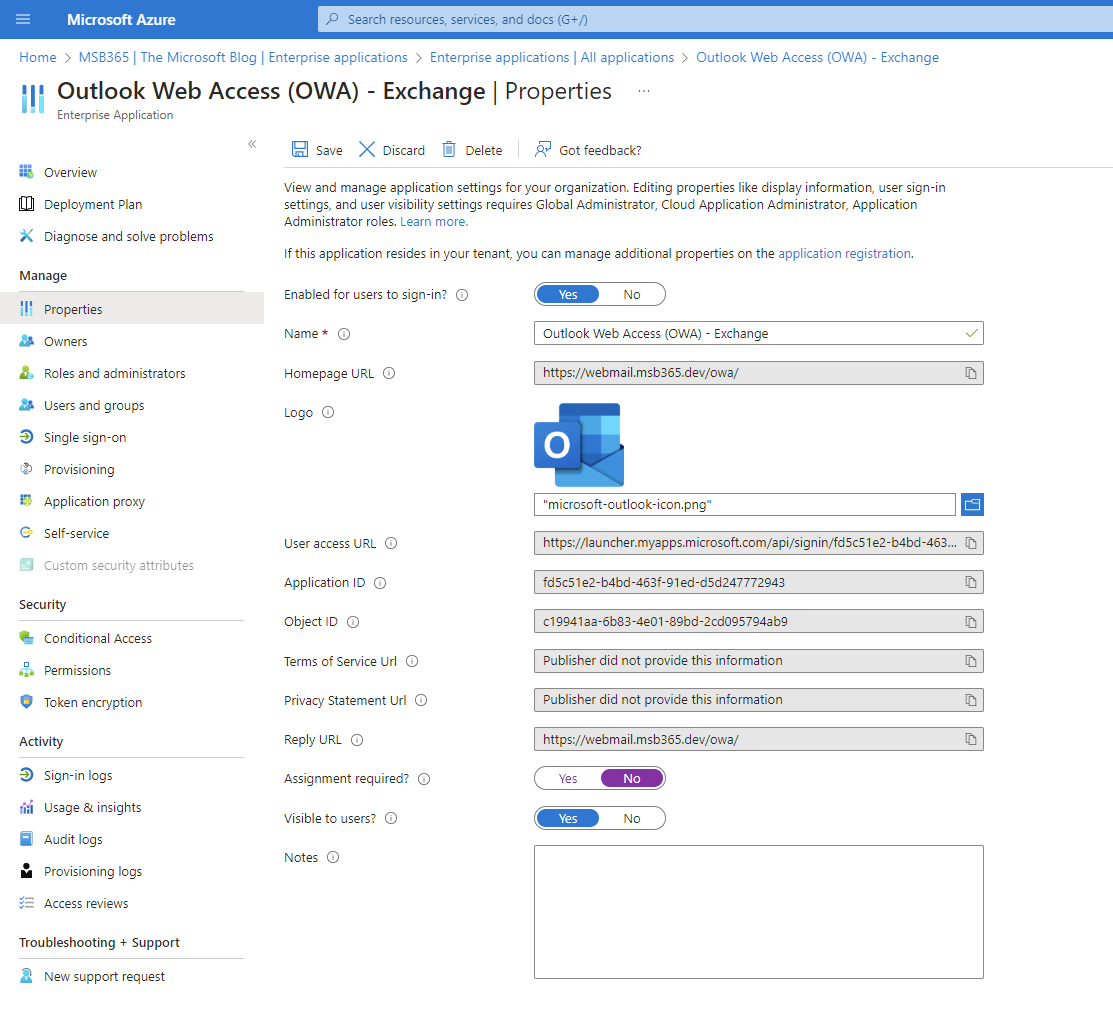 |
| Do not forget to enable the option Visible to users… | 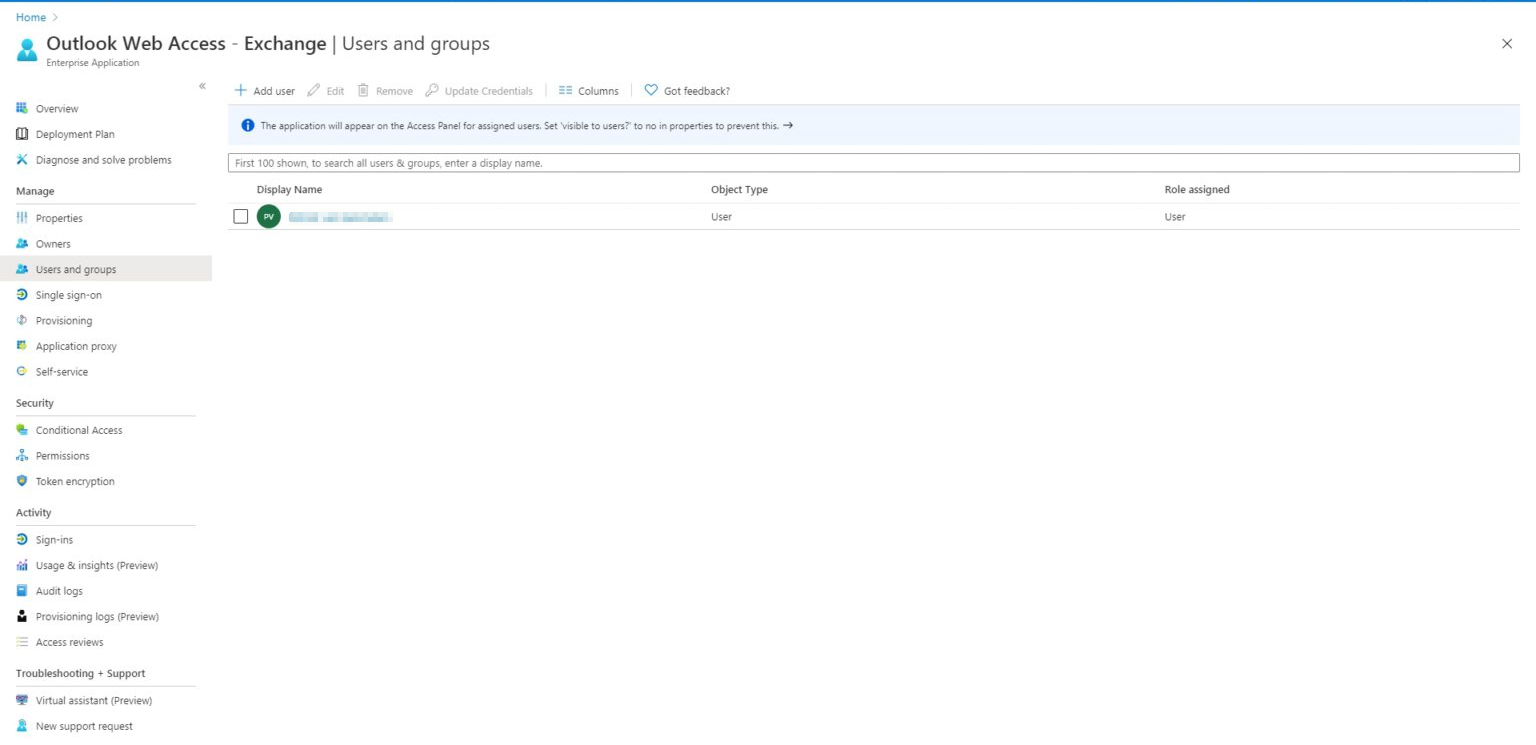 |
| Once the appropriate authorizations have been set, the new OWA application is visible to users and can be used easily. |  |
Authorization of restricted delegations for the application proxy
The next step is to allow the application proxy to request Kerberos tickets to authenticate to the Exchange Server on behalf of the user.
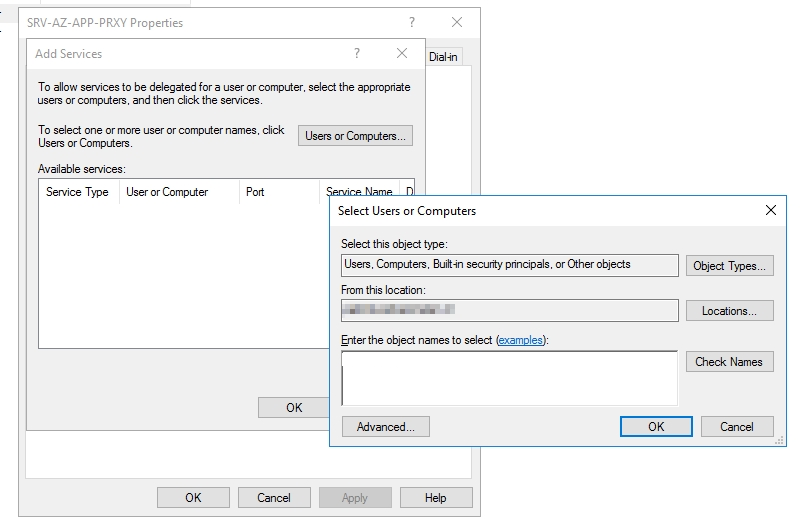
| To do this, we log in to one of our domain controllers and navigate to the Active Directory Users and Computers
Here we search for the computer object that is created for the Entra ID App Proxy Server and go to the Delegation tab.
Select Trust this computer for delegation to specified services only and Use any authentication protocol
Select Add… and type in your Exchange Server’s name, then press OK |
 |
| In the delegation TAB we now select the service type https. | 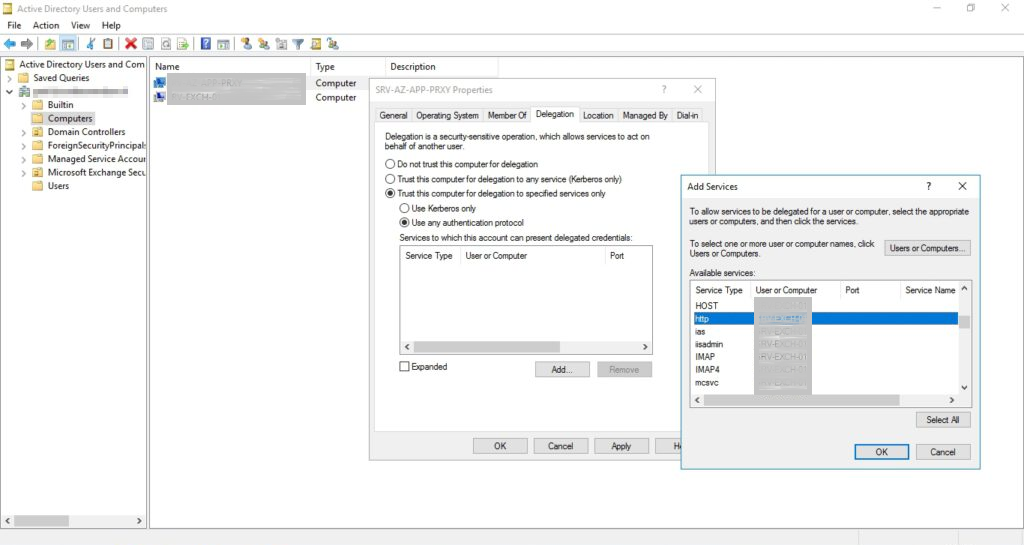 |
At this point we have now given our application proxy server the authorization to create Kerberos tickets on behalf of the user and to send these to the Exchange server as http requests.
Enabling Windows Authentication for Exchange environment
By default, form-based authentication is used for on-premise Exchange servers. If this is also the case in our example, we must now adapt this in the next step and switch to Windows Authentication.
The easiest way to do this is to open the Exchange MGMT shell on our Exchange server and execute the following two commands:
get-owavirtualdirectory | set-owavirtualdirectory -windowsauthentication $true


get-ecpvirtualdirectory | set-ecpvirtualdirectory -windowsauthentication $true
Please note: In order for the new settings to be adopted, we need to recycle the IIS app pools for OWA and the ECP.
This can be done on the Exchange Server in the IIS Management Console.
(Last step) Addin SSO ot the Outlook Web App
To ensure the best experience, there is one last step that we still need to perform. This involves configuring Single-Sign On (SSO) so that users are automatically logged in when they want to log in to OWA via our newly configured proxy.
| Go to the Single-Sign On page in your “Outlook Web App” Enterprise app and select Windows Authentication | 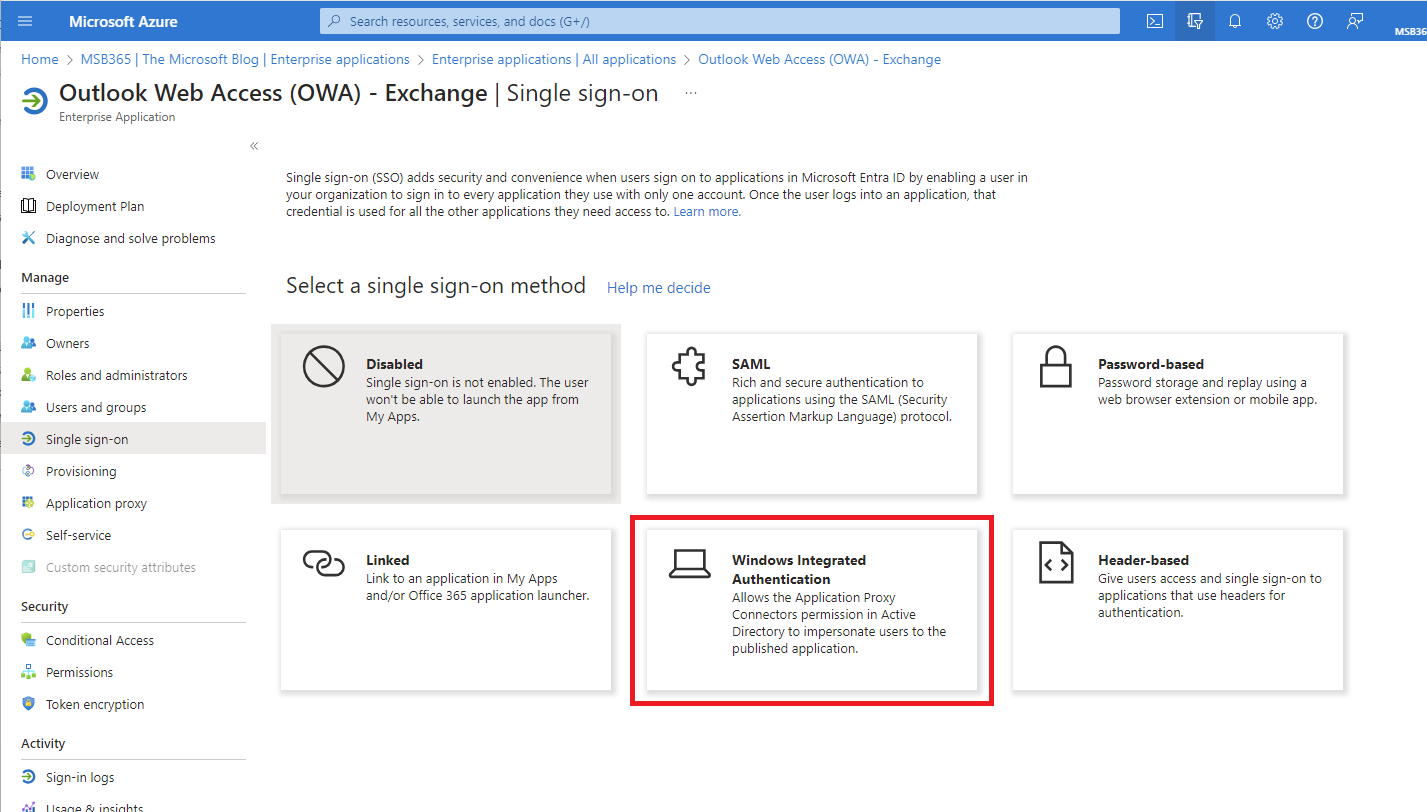 |
| Fill in the SPN in the following format service/servername so in this case it’s http/servername (1) and select User Principal Name (2) | 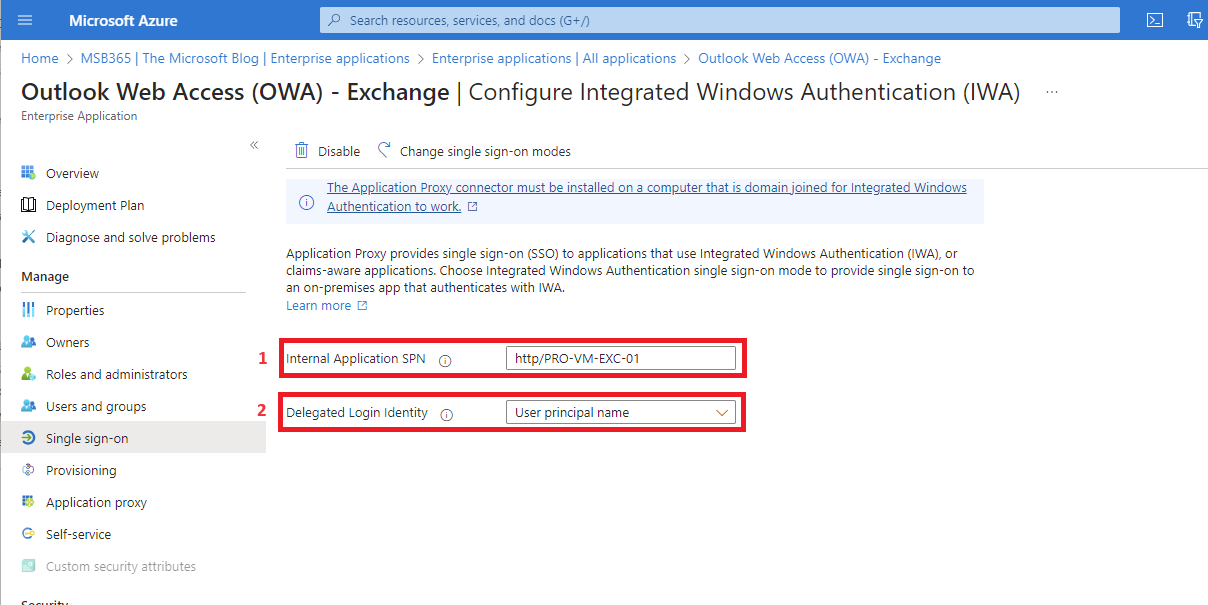 |
Done!
The OWA portal of our on-premise Exchange server is now accessible via the Entra Application Proxy. This means we now have the possibility to configure Conditional Access, Entra MFA and other security settings.
Further information
Microsoft has set up a FAQ page on this topic. Questions not covered in this article are described there in detail.
Disclaimer
I have deliberately not made various web paths unrecognizable in this article. As I have undone the configuration described here after creating this article. These are all visible paths